What Is Board and Batten Siding Repair (and When Do You Need It)?
Board and batten siding repair is the process of fixing damaged vertical siding panels — whether that’s cracked boards, rotted edges, peeling paint, loose battens, or large holes — to restore both the look and protective function of your home’s exterior.
Here’s a quick overview of the most common repairs and when they apply:
| Problem | Quick Fix | Replace Instead If… |
|---|---|---|
| Small cracks or splits | Wood putty or exterior glue | Crack runs full length of board |
| Loose or popped boards | Re-fasten with galvanized screws | Board is soft or rotted |
| Peeling paint | Scrape, prime, repaint | Paint is chalky across entire surface |
| Small holes | Plywood patch + water putty | Hole reveals rot or water damage |
| Rot at bottom edge | Cut out damage, install flashing + water table | Rot extends behind sheathing |
| Warping | Re-fasten and caulk gaps | Board is severely bowed or split |
Board and batten siding has been around since the 19th century — first used on barns and farmhouses across rural America. That classic vertical look is back in a big way on modern homes. But like any wood-based exterior, it takes a beating from rain, ice, and wind — especially in Wisconsin winters.
The good news? Most common damage is very fixable. You don’t need to re-side an entire home just because a few boards are cracked or a section near the ground has rotted out. Knowing how to diagnose the problem — and which repair method fits — saves you real money.
I’m Matt Smith, owner of Smith Roofing & Exteriors, and I’ve helped countless Wisconsin homeowners tackle board and batten siding repair — from patching small holes to replacing rotted bottom sections damaged by years of freeze-thaw cycles. Let’s walk through exactly how to get it done.
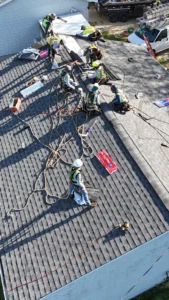
, common damage types (rot at bottom edge, cracks, holes, peeling paint, warping), and a decision flowchart for repair vs. replacement based on damage severity and location - board and batten siding repair infographic")
Essential Tools and Materials for Board and Batten Siding Repair
Before you start swinging a hammer or mixing up putty, you need the right gear. Working on siding in places like Fort Atkinson or Lake Mills means dealing with wood that has expanded and contracted through dozens of seasons. You want materials that can handle that movement.
The Toolbox Basics
- Jigsaw or Circular Saw: Essential for cutting out damaged sections or creating replacement patches. A jigsaw is particularly helpful for cutting precise shapes if you’re patching a hole.
- Pry Bar: For gently lifting battens or boards without cracking the surrounding wood.
- Hammer and Nail Set: To drive in new nails or reset “popped” ones.
- Drill and Bits: Always pre-drill holes in wood siding to prevent splitting, especially near the edges.
The Right Materials
- Fasteners: Use galvanized nails or stainless steel ring-shank nails. Ring-shanks are the gold standard because they have barbs that grip the wood, preventing the “nail pop” common in older homes.
- Fillers: For small cracks, a standard wood putty works. For larger holes, we highly recommend Durham’s Rock Hard Water Putty. It’s a powder you mix with water that dries incredibly hard and bonds well to exterior wood.
- Sealants: Never skip the exterior-grade caulk. This is your primary defense against moisture getting behind the boards.
- Wood Glue: A high-quality exterior wood glue is perfect for closing up vertical splits in boards.
- Patching Wood: Keep some birch plywood or matching cedar/pine boards on hand for structural patches.
If the damage looks like more than a weekend DIY project, you can always check out our specialized services for Fort Atkinson siding repair to ensure the job is done to professional standards.
Step-by-Step Guide to Fixing Common Issues
Most board and batten siding repair jobs fall into one of three categories: surface cosmetic fixes, structural re-fastening, or rot removal. The first step is always diagnosis. Walk your perimeter and look for “telltale” signs: dark stains (water damage), soft spots (rot), or boards that pull away from the wall when you push on them.
Fixing Small Cracks and Loose Boards
Cracks often happen because the wood was nailed too tightly, preventing it from moving as the humidity changes.
- Clean the Crack: Use a stiff brush to remove dirt or old paint from the split.
- Apply Glue or Putty: For narrow splits, pry the crack open slightly with a putty knife and squeeze in exterior wood glue. For wider gaps, use wood putty.
- Clamp and Secure: Use clamps to hold the split together while the glue dries. If the board is loose, drill pilot holes and drive in galvanized screws, sinking the heads slightly below the surface.
- Finish: Fill the screw holes with putty, sand smooth, and paint.
For residents in the Delavan area, keeping an eye on these small issues prevents them from turning into major structural headaches. If you’re unsure if a board is salvageable, our team provides expert Delavan siding repair assessments. Similarly, if you are located further west, we offer comprehensive Elkhorn siding repair to keep your home’s envelope tight.
Step-by-Step Board and Batten Siding Repair for Large Holes
Sometimes a “oops” moment happens—maybe a ladder fell, or you moved an outdoor light fixture and found a gaping hole behind the old mounting block. You don’t have to replace the whole 10-foot board.
- Create a Template: Use the “crayon rubbing” trick. Place a piece of paper over the hole and rub a crayon around the edges to get an exact shape.
- Cut the Patch: Trace that shape onto birch plywood or matching wood and cut it out with a jigsaw.
- Install Internal Supports: This is the secret to a professional repair. Since there’s nothing to nail the patch to in the middle of a wall, slide two small wooden blocks behind the existing siding and drill them in with screws. These act as “cleats” to hold your patch.
- Set the Patch: Screw your patch into those internal supports.
- Seal the Seams: Fill the gaps around the patch with Durham’s Rock Hard Water Putty. Apply it in thin layers, let it dry, and sand it down.
- Texture and Paint: If your siding is rough-sawn, don’t sand the putty perfectly smooth. Leave a little texture so it blends in once painted.
Handling Rot During Board and Batten Siding Repair
Rot is the “silent killer” of board and batten siding, usually starting at the bottom edge where the end-grain of the wood sucks up moisture from the ground or splashing rain.
- The “Cut-Off” Method: If the bottom 6-12 inches of your siding are rotted, you don’t necessarily need to replace the full vertical boards. You can cut the bottom section off at a uniform height across the whole wall.
- Treat the Ends: Once you make your cut, treat the exposed “fresh” wood ends with a preservative like Wolman’s Woodlife Classic. This prevents the rot from traveling upward.
- Install a Water Table: This is a horizontal trim board (usually beveled) that sits at the bottom. Before installing it, add a strip of self-adhering waterproofing membrane (like those found at grace.com) and Z-flashing. The flashing directs water away from the wall and over the new trim.
- Maintain Gaps: Leave a 1/8-inch gap between your vertical boards and the horizontal water table to allow for drainage and airflow.
If you’re dealing with significant moisture issues in Walworth, it’s often a sign that your gutter system or grading needs attention. We offer specialized Walworth siding repair to address these root causes.
Maintenance Tips to Prevent Future Damage
The best board and batten siding repair is the one you never have to do. Because wood is organic, it requires a little “TLC” to reach its full 20-to-40-year lifespan.
- Keep Your Distance: Ensure your siding sits at least 6 inches above the soil. If mulch or dirt is touching the wood, you’re inviting termites and rot.
- Vegetation Trimming: Trees and bushes should be trimmed back at least 12 inches from the siding. Leaves trap moisture against the wood and can cause mold or peeling paint.
- Annual Cleaning: Wash your siding once a year. Avoid high-pressure power washers, which can drive water deep into the seams. A garden hose, soft brush, and mild detergent are usually enough.
- Protective Finishes: If you have natural wood siding, apply a protective oil finish every few years. For painted siding, keep an eye out for “chalking”—when you rub the paint and a white powder comes off on your hand. That means the binder in the paint is failing, and it’s time for a fresh coat.
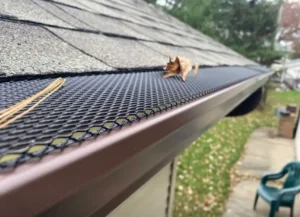
- Gutter Health: Overflowing gutters are the #1 cause of rotted siding. Ensure your gutters are clear so water doesn’t “sheet” down the face of your boards.
For homeowners in the Lake Geneva area, the humidity from the lake can accelerate wear. Regular Lake Geneva Siding Maintenance is key. We also offer maintenance guides and services for Walworth Siding Maintenance and Burlington Siding Maintenance to help you stay ahead of the weather.
Frequently Asked Questions
How much does board and batten siding repair typically cost?
On average, homeowners spend between $400 and $600 for professional repairs. However, this can vary based on the material (wood is typically more expensive to repair than vinyl) and the height of the damage. If we have to set up scaffolding for a second-story repair, the labor cost will increase.
Can I DIY board and batten siding repairs?
Yes! Small cracks, popped nails, and even minor hole patching are great DIY projects. However, if you see signs of structural rot, mold behind the boards, or if the siding is buckling, it’s time to call in the pros. Improperly installed flashing during a DIY repair can trap water inside your walls, leading to thousands of dollars in hidden damage.
How long does board and batten siding last after repairs?
With proper installation and routine maintenance, well-repaired siding can last another 20 to 40 years. The key is ensuring that the root cause of the damage (like moisture or poor drainage) is fixed along with the board itself. Upgrading your home can have massive long-term perks; read more about the top benefits of upgrading your home with siding replacement if your current boards are reaching the end of their life.
Conclusion
At Smith Roofing & Exteriors, we believe that your home’s siding is its first line of defense. Whether you’re dealing with a woodpecker hole or a rotted baseboard, board and batten siding repair doesn’t have to be a headache. By catching issues early and using the right materials—like galvanized fasteners and high-quality sealants—you can keep your home looking beautiful for decades.
We are a local, family-owned team based in Fort Atkinson, WI, serving our neighbors in Jefferson, Lake Mills, and across Southeastern Wisconsin. We pride ourselves on transparent pricing and an “honesty-first” approach—if a board can be repaired, we’ll fix it; if it needs to be replaced, we’ll tell you why.
Ready to get your siding back in tip-top shape? From emergency repairs to routine maintenance, we’re here to help. Check out our Elkhorn siding services or contact us today for a free, no-pressure consultation. Let’s make sure your home is ready for whatever the Wisconsin weather throws at it next!