Why Roof Leak Repair Can’t Wait
Roof leak repair is the process of finding and fixing the point where water is getting into your home through the roof — before it causes serious damage.
Here’s a quick overview of the most common fixes:
| Problem | Common Fix |
|---|---|
| Damaged shingles | Replace individual shingles |
| Cracked vent boot | Replace rubber boot and reseal |
| Failed flashing | Reseal or replace metal flashing |
| Roof deck damage | Cut out and patch with new plywood |
| Flat roof membrane | Patch with EPDM and contact cement |
That drip you hear during a storm isn’t just annoying — it’s a warning sign. Left alone, even a small roof leak can lead to:
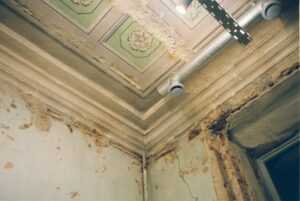
- Mold and mildew growth inside walls and ceilings
- Rotting wood framing that weakens your home’s structure
- Damaged insulation that drives up your energy bills
- Stained or sagging drywall that’s expensive to replace
- Lower property value when it comes time to sell
The tricky part? Water rarely drips straight down from where it enters. It travels along rafters, beams, and sheathing — sometimes several feet — before showing up as a stain on your ceiling. That’s what makes finding the source so frustrating.
I’m Matt Smith, owner of Smith Roofing & Exteriors, and I’ve spent years helping Wisconsin homeowners track down and fix stubborn roof leaks of every kind — from simple shingle repairs to full deck replacements. I’ll walk you through everything you need to know about roof leak repair in this guide.

Identifying the Source of a Roof Leak
Finding the exact spot where water enters your home is often the hardest part of roof leak repair. Because water follows the path of least resistance, it may enter through a cracked shingle near the peak, run down a rafter for ten feet, and finally drip onto your master bedroom ceiling. leaky roof can be destructive, so accuracy is key.

The Attic Inspection
The best place to start is in the attic. Grab a bright flashlight and head up there during a rainstorm or immediately after one. Look for:
- Wet Spots and Stains: Check the underside of the roof sheathing and the sides of the rafters.
- Flow Lines: Water often leaves “trails” or dark streaks on the wood as it travels.
- Mold or Rot: If the leak has been happening for a while, you might see black mold or wood that looks soft and crumbly.
- Projections: Pay extra attention to areas around chimneys, plumbing vents, and attic fans. These are the most common failure points.
The Hose Test
If it’s a sunny day and you can’t find the culprit, you’ll need to simulate a storm. This requires two people: one on the roof with a garden hose and one in the attic with a flashlight. Start at the lowest point of the suspected area and soak it for several minutes. The person inside should watch for the first sign of a drip. Move upward slowly. If you move too fast, the water might run down from a higher point and confuse your search. Understanding The Difference That a Timely Roof Repair Can Make starts with this precise detection.
Essential Tools and Materials for Roof Leak Repair
Before you climb that ladder, you need the right gear. Using the wrong sealant or a dull knife won’t just make the job harder—it might actually cause more damage. We recommend keeping a “leak kit” ready, especially during our volatile Southeastern Wisconsin seasons.
For a standard roof leak repair, you will need:
- Flat Bar (Pry Bar): Essential for lifting shingles and pulling nails without tearing the material.
- Utility Knife: For trimming shingles or cutting away damaged underlayment.
- Caulk Gun and Roof Sealant: Do not use standard latex caulk. You need a high-quality, rubberized roof sealant like Henry 208R, which can even be applied in wet conditions.
- Roofing Nails: Use 1-1/4 inch or 1-3/4 inch galvanized nails that won’t rust.
- Replacement Shingles: Try to match your existing brand and color to maintain curb appeal.
- Hammer: A standard framing or roofing hammer.
- Tin Snips: If you need to cut or adjust metal flashing.
You can find more specific advice on material selection in our Category: Roof Leak section.
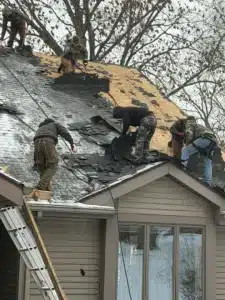
Step-by-Step Guide to Common Repairs
Most roof leak repair jobs fall into three categories: fixing shingles, sealing vents, or patching the deck. Here is how to handle the most common issues we see in places like Fort Atkinson and Lake Geneva.
Fixing Vent Boots and Flashing for Roof Leak Repair
Plumbing vent boots are notorious for leaking. The rubber collar (the “boot”) that seals the pipe often cracks after 10–12 years of Wisconsin sun and ice.
- Remove the Old Boot: Use your flat bar to pry up the shingles covering the base of the vent. Pull the nails holding the flashing down.
- Slide on the New Boot: You can often replace just the boot if the metal base is still good. Slide the new rubber collar over the pipe.
- Seal and Nail: Apply a thick bead of roof sealant under the new flashing. Nail the base down and cover the nail heads with more sealant.
- Replace Shingles: Slide the shingles back over the top and sides of the flashing, leaving the bottom edge exposed so water can run off.
If you find that the flashing around your chimney or dormer is rusted through, it’s often a sign of a larger problem. Knowing When to Call for Emergency Roof Repair and What Happens Next is vital when flashing fails, as these areas handle massive volumes of water.
Patching the Roof Deck and Shingles for Roof Leak Repair
If a leak is ignored, the plywood underneath (the “deck”) will eventually rot. This requires a more intensive roof leak repair.
- Remove Shingles: Clear a large area around the damage to expose the wood.
- Cut Out the Rot: Use a circular saw to cut out the soft, water-damaged plywood. Make sure your cuts stop halfway across a rafter so the new patch has a solid surface to nail into.
- Install New Decking: Measure and cut a piece of CDX plywood or OSB to match the hole. Nail it every 6 inches with 8d nails.
- Apply Underlayment: Cover the new wood with a “peel-and-stick” ice and water shield. This is much more effective than standard felt paper.
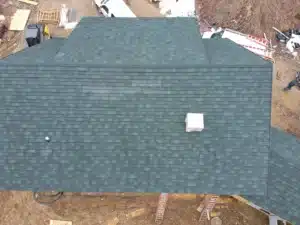
- Install New Shingles: Start from the bottom and work your way up, overlapping the shingles correctly to shed water.
Deciding between a patch and a full replacement can be tough. We’ve put together a guide on Roof Repair vs Replacement: What’s the Right Move to help you weigh the costs.
Safety and Prevention: Avoiding Future Roof Leak Repair
Roof work is dangerous. According to safety experts, falls are the leading cause of injury in the construction industry. We always use a Personal Fall Arrest System (PFAS) when we’re on a job in Burlington or Edgerton, and you should too.
- Ladder Safety: Ensure your ladder extends at least 3 feet above the roof edge and is on stable, level ground.
- Work with a Partner: Never climb a roof alone. You need someone to steady the ladder and call for help if something goes wrong.
- Proper Footwear: Wear soft-soled boots with good grip. Avoid working on wet or icy roofs unless it is an absolute emergency.
- Fall Protection: For steep slopes, consult this guide provided by Princeton University regarding harness systems.
Preventative Maintenance
The best roof leak repair is the one you never have to do.
- Clean Your Gutters: Clogged gutters force water back up under the shingles, causing “ice dams” in the winter.
- Trim Your Trees: Keep branches at least 3 feet away from your roof to prevent them from scraping off the protective granules on your shingles.
- Annual Inspections: Check your roof every spring and fall for curled shingles or cracked sealant around vents.
Professional Intervention vs. DIY Solutions
While a small shingle fix is a great weekend project, some roof leak repair tasks require professional expertise. If you see sagging ceilings, large areas of mold, or if the roof feels “spongy” under your feet, the structural integrity of your home is at risk.
| Feature | DIY Repair | Professional Repair |
|---|---|---|
| Typical Cost | $10 – $120 | $360 – $1,550 |
| Time Required | 4 – 8 hours | 1 – 3 hours |
| Warranty | None | 1 – 10 year Labor Warranty |
| Safety Risk | High | Low (Insured) |
| Tools Needed | Must purchase/rent | Included |
Hiring a pro also helps with insurance. Most homeowners insurance policies cover roof leak repair if the damage was caused by a sudden event like a storm, but they may deny the claim if they see evidence of “shoddy” DIY work. Check out the Top 7 Signs Your Home Needs Emergency Roof Repair to see where your situation falls. There are 5 Reasons to Fix Roof Leaks ASAP, and saving your home’s structure is number one.
Frequently Asked Questions about Roof Leaks
What temporary fixes stop a leak during heavy rain?
If it’s pouring and you can’t get on the roof, you can use a heavy-duty plastic tarp. Secure it over the peak of the roof and down past the leak area using 2×4 wooden strips nailed into the roof (don’t worry about the extra holes; you’ll be repairing that section anyway). Inside, place buckets under the drips and consider “poking” a small hole in a sagging drywall ceiling to let the water drain into the bucket rather than spreading across the ceiling.
When should I replace my roof instead of repairing it?
As a general rule, if more than 10% of your roof needs roof leak repair, or if the asphalt shingles are over 20 years old, it’s time for a replacement. If you notice a massive loss of granules (it will look like sand in your gutters) or if you have multiple leaks in different rooms, the material has likely reached the end of its lifespan.
What are the most common causes of roof leaks?
In Southeastern Wisconsin, the “Big Three” are age, storm damage (hail/wind), and ice dams. However, faulty installation is a close fourth. If a previous contractor didn’t use enough nails or skipped the flashing around a chimney, the roof will leak regardless of how new the shingles are.
Conclusion
A leaking roof is a high-stakes problem, but it doesn’t have to be a disaster. Whether you’re tackling a small roof leak repair yourself or you need a professional team to handle a complex structural issue, the key is to act quickly.
At Smith Roofing & Exteriors, we take pride in serving our neighbors across Fort Atkinson, Lake Mills, and the surrounding areas. We offer transparent pricing, superior materials, and 24/7 emergency services for those nights when the Wisconsin weather decides to test your home’s limits.
Don’t let a small drip turn into a major renovation. Call Roof Repair Contractor to Fix Your Roof today and let us give you the peace of mind you deserve.