Why Knowing How to Fix Fiber Cement Siding Can Save You Thousands
When you need to fix fiber cement siding, the good news is that most common problems — cracks, holes, loose boards, and gaps — can be repaired without replacing an entire wall.
Quick answer: How to fix fiber cement siding
- Identify the damage type — crack, hole, loose board, or gap
- Small cracks and holes — fill with exterior repair putty, sand smooth, prime, and paint
- Loose or sagging boards — locate studs and re-fasten with corrosion-resistant nails
- Gaps at joints — caulk vertical joints and install backer flashing behind butt joints
- Cracked or water-damaged boards — remove the plank, inspect the underlayment, then install a replacement board with matching reveal
Fiber cement is one of the toughest exterior cladding materials available. It resists fire, insects, and harsh weather — and James Hardie alone has it on more than 10 million homes across the country. But even the most durable siding isn’t immune to damage. Whether it’s a Wisconsin ice storm, a branch strike, a rogue lawn mower, or a faulty original install, things go wrong eventually.
The key is catching problems early and fixing them the right way — not just covering up the symptom.
This guide walks you through every common repair scenario, from patching a small hole to replacing a full board, so you can protect your home and keep it looking its best.
I’m Matt Smith, owner of Smith Roofing & Exteriors, and I’ve helped homeowners throughout rural Wisconsin fix fiber cement siding damaged by everything from freeze-thaw cycles to hail and pest intrusion. If anything in this guide raises questions about your specific situation, I’m always just a call away.

Simple fix fiber cement siding word guide:
What Damages Fiber Cement Siding in the First Place?
Fiber cement is durable, but it is not magic armor. Most repair calls come back to a handful of repeat offenders:
- Poor installation
- Missing or incorrect flashing
- Overdriven or poorly placed nails
- Water intrusion behind the siding
- Freeze-thaw cycling in Wisconsin winters
- Impact from hail, branches, ladders, and lawn equipment
- Structural movement
- Rodents or other pest damage
- Normal aging on older siding
Many fiber cement products carry long warranties, often around 30 years for siding and 15 years for trim when installed correctly. That does not mean every wall will stay perfect for 30 years. Anything sitting outside for 30 to 40 years is going to face wear, weather, and the occasional run-in with real life.
The most common causes homeowners run into
In our area of Southeastern Wisconsin, the biggest causes are moisture and impact.
Poor installation is a huge one. If butt joints lack backer flashing, nails are overdriven, siding sits too close to grade, or kickout flashing is missing where a roof meets a wall, water can sneak in and quietly cause trouble for years.
Chronic wetting is another common problem. Overflowing gutters, splash-back from hard surfaces, misdirected sprinklers, and snow sitting against the wall can all keep fiber cement wet longer than it should be.
Then there is the less glamorous list:
- Weed trimmers chipping bottom edges
- Lawn mowers tossing rocks
- Hail bruising exposed edges
- Branches cracking planks during storms
- Rodents chewing or nesting near vulnerable areas
- Settling or framing movement creating stress cracks near windows and doors
How to spot cracks, holes, loose boards, and gaps early
A quick inspection twice a year can save a lot of money later.
Look for:
- Hairline cracks, especially near ends and around openings
- Edge chips or broken corners
- Small punctures from impact or contractor damage
- Loose or sagging planks
- Open butt joints or trim gaps
- Peeling paint or bubbling finish
- Water stains below joints
- Soft sheathing or spongy areas behind the siding
A good trick is to step back and inspect the wall from different angles. Morning or evening sunlight makes raised edges and cracks easier to see. Binoculars are helpful for upper walls so you do not have to play superhero on a ladder for every inspection.

When minor damage is repairable and when replacement makes more sense
Minor damage is usually repairable when:
- The crack is small and localized
- The hole is cosmetic, not structural
- One board is damaged but nearby boards are sound
- The sheathing behind the siding is dry and solid
- Color matching is still realistic
Replacement is often smarter when:
- Multiple boards are failing
- Moisture damage has spread behind the wall
- Joints keep reopening
- The siding is badly mismatched, brittle, or repeatedly patched
- The wall has flashing defects that require broader tear-off
If you are seeing repeat failures, it may be time to look beyond a spot repair. Here are some signs it may be time to call a siding replacement company.
Tools, Safety Gear, and Materials to Fix Fiber Cement Siding
Before you start, gather the right gear. Fiber cement is heavy, brittle, and dusty when cut. This is not the moment for flip-flops and optimism.
Safety rules before you fix fiber cement siding
Cutting or sanding fiber cement can release crystalline silica dust. That means safety is not optional.
Use:
- P100 respirator, especially for cutting or sanding
- Safety glasses
- Hearing protection
- Cut-resistant gloves
- Stable ladder or scaffolding
- Outdoor cutting setup with dust control if possible
Also check for utility lines before drilling or cutting. If a damaged area has gas, electrical, or HVAC lines passing through it, slow down and plan the repair carefully.
This Fiber-cement siding field guide is a useful technical reference for safe handling, cutting, and fastening practices.

The repair kit checklist for patching, re-securing, or replacing boards
For most repairs, we recommend having:
- Flat pry bar
- Wood shims
- Oscillating multi-tool with metal-cutting blade
- Nail puller or end nippers
- Fiber cement shears or approved cutting blade
- Stud finder
- Chalk line
- Tape measure
- Putty knife
- Sandpaper
- Corrosion-resistant siding nails
- Matching fiber cement board
- Joint flashing or slip sheet
- Weather-resistive barrier patch
- Alkali-resistant primer
- 100% acrylic exterior paint
- Paintable exterior sealant for vertical joints and trim clearances
- Masonry bit if hand nailing near edges
Materials that should never be skipped
Some materials are easy to overlook, but they matter a lot:
- Backer flashing behind butt joints
- WRB patch if the weather barrier is torn
- Primer on all field-cut edges
- Proper fastener penetration into framing
- Reveal gauge or layout marks to match existing exposure
- Non-corrosive fasteners such as hot-dipped galvanized or stainless
A few best practices come straight from manufacturer-style guidance: maintain proper clearances, use corrosion-resistant nails, and never skip priming cut edges. Unsealed cut ends can absorb moisture like a straw.
Essential tools and materials
- Respirator, eye protection, gloves
- Pry bar, shims, oscillating tool
- Matching siding and corrosion-resistant nails
- Flashing, WRB patch, sealant
- Primer, paint, patch compound
How to Fix Fiber Cement Siding by Damage Type
The right repair depends on the problem. A hairline crack does not need the same treatment as a water-damaged plank with rotten sheathing behind it.
How to fix fiber cement siding when a board is cracked or water-damaged
If the board is split, swollen, soft, or badly cracked, replacement is usually the correct repair.
Basic process:
- Confirm the damage is limited to one board or a small section.
- Gently lift the overlapping course above the damaged plank.
- Use wood shims to hold the upper board slightly away and protect its edge.
- Cut or pull the hidden nails securing the damaged board.
- Remove the plank carefully.
- Inspect the sheathing, insulation, and WRB behind it.
- Repair any moisture damage before siding goes back on.
- Cut a replacement board to fit.
- Prime cut ends.
- Install the replacement with matching reveal and proper fastening.
- Touch up paint and re-seal vertical joints if needed.
How to remove a damaged board without breaking the surrounding siding
This is where patience pays off.
Most lap fiber cement siding is blind nailed near the top edge, then covered by the next course. To remove one board without wrecking the row above it:
- Slip a flat bar under the lower edge of the board above
- Insert wood shims as buffers
- Gently lift just enough to access the fasteners
- Cut hidden nails with an oscillating tool or pull them if accessible
- Ease the damaged board outward in small increments
If multiple rows are damaged, work from the top damaged piece down or remove enough material to rebuild from the bottom up cleanly. In some repairs, the final replacement board may need face-nailing because its blind nailing area is blocked by installed courses above. That is normal and acceptable when done correctly.
How to inspect and repair the underlayment before new siding goes on
Never replace a damaged board without checking what is behind it. If water caused the failure, the real problem may be hidden.
Inspect for:
- Soft or rotten sheathing
- Torn or missing weather barrier
- Wet insulation
- Rusted fasteners
- Staining below windows, roof intersections, or butt joints
- Missing kickout or diverter flashing
Repair steps may include:
- Replacing damaged sheathing
- Patching the WRB so it laps correctly for drainage
- Adding joint flashing behind seams
- Correcting roof-to-wall flashing details
- Fixing gutter or drainage issues that caused the wetting
If the wall has repeated water exposure, do not just patch the siding and hope for the best. Hope is not a flashing system.
How to install the replacement board with the correct reveal
Matching the reveal is what keeps the repair from shouting, “Look at me, I was fixed on Saturday.”
Use these steps:
- Measure the exposure on surrounding courses.
- Snap a chalk line or use reveal gauges to match alignment.
- Slide in the new board, leaving proper joint spacing where required.
- Install backer flashing behind butt joints.
- Fasten into studs with corrosion-resistant nails.
- Blind nail when possible.
- If needed, face-nail the final board near the bottom edge into studs.
- Set nails snug, not overdriven.
- Prime and paint fastener heads and cut ends.
- Re-caulk vertical trim joints if disturbed.
A practical step-by-step reference is this guide on how to fix fiber cement siding.
Small Repairs That Don’t Require Full Board Replacement
Not every problem needs a whole new plank. Small holes, chips, and hairline cracks can often be patched successfully if the board is still solid and dry.
How to fix fiber cement siding holes and small cracks with a patch
For minor cosmetic damage:
- Clean the damaged area thoroughly.
- Remove any loose crumbs or flaking material.
- Apply a fiber-cement-compatible exterior repair putty or patch compound.
- Shape the patch to match the board surface.
- Let it cure fully.
- Sand smooth.
- Spot-prime the repair.
- Paint with matching 100% acrylic exterior paint.
If the board has a woodgrain texture, you can lightly texture the patch before it sets using a stiff brush or similar tool.
This method works best for:
- Small holes
- Edge chips
- Hairline surface cracks
- Minor contractor damage
It is not the right fix for a board that is soft, swollen, or structurally broken.
How to re-secure loose or sagging fiber cement siding
Loose boards are often caused by missed studs, overdriven nails, or fasteners that did not hold well over time.
To re-secure them:
- Locate the studs with a stud finder.
- Press the plank back into position.
- Fasten into solid framing with corrosion-resistant nails.
- Place face nails neatly where they will be least noticeable and still structurally effective.
- Avoid overdriving, which reduces holding power.
- Touch up the nail heads with primer and paint.
Face-nailing is especially useful for loose lower edges or the last board in a repair area. Keep fasteners aligned and clean-looking. Sloppy nail placement turns a repair into a permanent eyesore.
How to handle gaps at butt joints and trim joints
This one causes a lot of confusion.
Small gaps at fiber cement joints can be normal because boards need a little room for movement. Fiber cement moves less than wood, but it is not completely motionless. The key is knowing which gaps are acceptable and which signal a problem.
Best practices:
- Use backer flashing behind butt joints
- Maintain proper trim clearances
- Use flexible exterior sealant at vertical trim joints when the system calls for it
- Do not caulk horizontal lap overlaps
- Replace boards if joint gaps are excessive or the cut is poor
If a butt joint opens too wide, especially beyond what would reasonably be covered by normal detailing, replacing the piece is usually better than trying to hide it with a blob of caulk. Oversized gaps often point to shrinkage, bad cutting, or installation error.
For more on seam issues, see Don’t Let Your Hardie Board Seams Become a Nightmare and this technical resource on fiber cement siding repair advice.
Prevent Future Damage After You Fix Fiber Cement Siding
A repair only lasts if the cause of the problem is also fixed.
Installation details that prevent repeat failures
The details matter more than most homeowners realize. Good installation should include:
- At least 6 inches of clearance above grade
- At least 1 inch above decks, roofs, and hard surfaces where water can collect
- Proper lap overlap
- Backer flashing behind joints
- Kickout flashing where roofs dump water into walls
- Correct nail placement into framing
- Primed cut edges
These details help keep water moving out and away instead of sneaking behind the siding.
Maintenance habits that extend siding life
Fiber cement is low maintenance, not no maintenance.
We recommend:
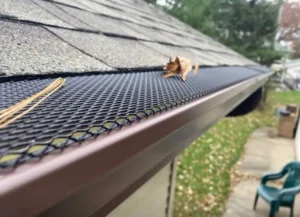
- Cleaning gutters regularly
- Keeping sprinklers off the walls
- Washing siding gently with low-pressure water and mild detergent
- Checking sealant around trim and penetrations
- Inspecting after hail or wind storms
- Watching for pest activity
- Repainting on schedule
Paint and caulk often need maintenance in the 10- to 15-year range, depending on sun exposure and weather. Keeping the finish intact helps keep moisture out and the repair looking good.

DIY vs professional repair: when to call for help
DIY can make sense for:
- A small patch
- One accessible loose board
- A simple low-level replacement with no moisture damage
It is time to call a pro when:
- The repair is on a second story
- You suspect sheathing rot or hidden moisture
- Joint failures keep coming back
- Flashing needs correction
- Matching older siding is difficult
- Storm damage may involve insurance
- You need emergency help after a sudden failure
At Smith Roofing & Exteriors, we help homeowners across Fort Atkinson, Lake Mills, Jefferson, Burlington, Delavan, Elkhorn, Lake Geneva, Walworth, Edgerton, and surrounding Southeastern Wisconsin with siding repairs, replacements, and urgent exterior issues. Our team focuses on durable repairs, clear communication, and transparent pricing.
Frequently Asked Questions About Fix Fiber Cement Siding
Can you patch fiber cement siding instead of replacing a whole board?
Yes, if the damage is small and the board is otherwise sound. Small holes, chips, and hairline cracks can usually be patched, sanded, primed, and painted. If the board is swollen, soft, broken through, or leaking water, replacement is the better option.
Is face-nailing acceptable on fiber cement siding repairs?
Yes. Face-nailing is often appropriate in repairs, especially for the last replacement board under overlapping courses or when re-securing a loose plank. The important part is to fasten into studs, place nails cleanly, avoid edges, and touch up the finish afterward.
How long does repaired fiber cement siding last?
A well-done repair can last many years, especially when the root cause is fixed. The biggest factors are:
- Whether moisture problems were solved
- Whether flashing was corrected
- Whether cut edges were primed
- Whether the board was fastened properly
- Whether paint and caulk are maintained over time
If the workmanship is solid and water is managed correctly, repaired fiber cement can perform for a very long time.
Conclusion
When you need to fix fiber cement siding, the smartest approach is simple: diagnose the real problem, use the right materials, and repair the wall in a way that keeps water out for good.
Small cracks and holes may only need a patch. Loose boards may only need careful re-fastening. But when siding is cracked through or water-damaged, proper board replacement and underlayment inspection are the difference between a lasting fix and a repeat headache.
If you want help getting the repair right, Smith Roofing & Exteriors is here for homeowners across Fort Atkinson and nearby Southeastern Wisconsin communities. You can also read more in our guide on how to fix siding issues in 5 simple steps or visit our Elkhorn siding page.