Why Patching Fiber Cement Siding Is Worth Getting Right
Patching fiber cement siding the right way can save you thousands of dollars compared to a full board replacement — but only if you use the right materials and steps.
Here’s the quick answer on how to patch fiber cement siding:
- Clean the damaged area with mild detergent and let it dry completely.
- Remove loose material and undercut or score the edges for better adhesion.
- Apply a cementitious or acrylic mortar patching compound (not wood filler).
- Layer the compound for holes deeper than 1/8 inch, letting each layer partially cure.
- Sand the cured patch smooth and flush with the surrounding surface.
- Prime with an alkali-resistant exterior primer, then finish with two coats of 100% acrylic paint.
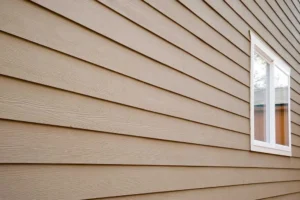
Fiber cement is one of the toughest siding materials out there. It resists rot, insects, and fire — and it’s often called a 100-year product. But even the toughest materials take a hit sometimes. HVAC crews drill in the wrong spot. A weed trimmer clips the bottom course. A harsh Wisconsin winter works a crack into a seam. Suddenly you’ve got a hole or a chip that’s letting moisture sneak behind your siding.
The good news? Many of these repairs are manageable without replacing an entire board — as long as you approach them correctly.
About 20% of homes with siding face significant issues within the first 10 years, and a small unaddressed crack can quietly turn into a costly moisture problem behind your wall. Acting early matters.
I’m Matt Smith, owner of Smith Roofing & Exteriors, and I’ve spent years helping Wisconsin homeowners tackle everything from minor chips to full board replacements — including patching fiber cement siding on homes facing everything our local climate can throw at them. Let’s walk through exactly how to do this right, so your repair holds up for the long haul.

Discover more about patching fiber cement siding:
When to Choose Patching Fiber Cement Siding vs. Board Replacement
Before we grab our putty knives, we need to ask a critical question: is this board actually salvageable, or is it too far gone?

Evaluating the damage correctly is the difference between a quick, permanent fix and a temporary band-aid that hides structural rot. Here in Southeastern WI, our siding has to withstand heavy humidity in summer and freezing temperatures in winter. This constant temperature swing causes materials to expand and contract, which can worsen minor cracks over time.
When we inspect a home’s siding, we look at three main factors:
- Crack Severity: If a crack runs completely through the board (a through-fracture) or if the board is delaminating (peeling apart in layers), patching won’t restore its structural integrity.
- Hole Diameter: Small holes under 1 inch—like those left by old cable lines, misplaced HVAC penetrations, or nesting pests—are perfect candidates for patching. If a hole is larger than 1 inch, or if there are multiple impact fractures from hail or lawnmowers, replacing the plank is the safer, more durable choice.
- Moisture Intrusion: We often perform a quick “probe test” using a screwdriver to check the wood framing behind the siding. If the backing material feels soft or spongy, moisture has already penetrated the water-resistive barrier (WRB). Patching the surface won’t fix the rot underneath.
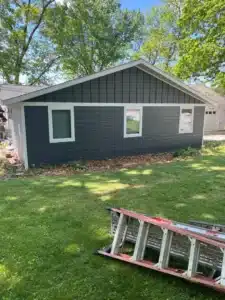
If you notice widespread cracking, warping, or soft spots across multiple walls, it might be a sign of a larger, systemic installation failure. In those cases, you’ll want to review the signs it’s time to call a siding replacement company to protect your home’s structural framing.
Here is a quick reference table we use to help homeowners in Fort Atkinson and Lake Mills decide whether to patch or replace:
| Damage Type | Patching Criteria | Replacement Criteria |
|---|---|---|
| Cracks & Fractures | Surface hairline cracks under 1/4 inch wide; no movement in the plank. | Deep through-cracks, splitting, or loose, sagging planks. |
| Holes & Punctures | Holes under 1 inch in diameter (e.g., old utility lines, pest damage). | Holes larger than 1 inch or shattered sections from high impact. |
| Moisture Exposure | Surface discoloration; surrounding material is firm and dry. | Spongy backing, active leaks, or wood rot behind the board. |
| Plank Alignment | Siding is flat, secure, and properly fastened to the studs. | Planks are cupping, buckling, or pulling away from the wall. |
Choosing the Best Materials for Siding Repairs
If you’ve ever walked down the adhesive aisle at a local hardware store in Jefferson or Burlington, you know how overwhelming the options can be. But when it comes to fiber cement, choosing the wrong material can cause the patch to fail within a single season.

Fiber cement is a composite material made from Portland cement, sand, water, and cellulose fibers. Because of its cementitious base, it does not behave like wood or vinyl. It has unique thermal expansion properties, and it requires patching materials that can chemically bond with cement while resisting moisture absorption.
Selecting the Right Compound for Patching Fiber Cement Siding
We cannot stress this enough: do not use standard wood fillers or drywall spackle on your siding. These products are designed for interior use or wood-based materials. They lack the necessary adhesion, weather resistance, and flexibility required for exterior cement cladding. When exposed to Wisconsin rain and snow, wood fillers will absorb water, swell, soften, and eventually pop right out of the hole.
Instead, look for these recommended materials:
- Cementitious Patching Compounds & Acrylic Mortars: These are specifically formulated for concrete, masonry, and fiber cement. They offer excellent chemical compatibility, superior dimensional stability, and they won’t shrink or crumble as they cure. If you want a seamless, durable repair, finding the best patching compound for Hardie board is your best first step.
- Exterior Epoxy Putty (e.g., SculpWood): This is a moldable, two-part epoxy putty that is highly effective for rebuilding chipped corners or filling deep holes. It cures to a rock-hard finish, won’t shrink, and can be easily sanded and painted. It’s especially useful for repairing damage caused by pests or physical impacts.
- Bondo (Automotive Body Filler): While originally designed for cars, many professional siding installers use exterior-grade Bondo for quick, durable repairs on small holes. It cures incredibly fast and provides a highly moisture-resistant seal. However, because it cures so quickly, you have to work in small batches and apply it with precision.
Essential Tools for Patching Fiber Cement Siding
Before starting your repair, gather these essential tools to ensure the job goes smoothly and safely:
- Putty Knife: A flexible 2-inch putty knife is ideal for mixing, applying, and feathering the patching compound.
- Utility Knife: Useful for scoring around damaged edges and cleaning out loose fibers.
- Safety Goggles: Protects your eyes from flying debris during prep work and sanding.
- N95 or P100 Respirator: This is non-negotiable. Fiber cement contains crystalline silica sand. Sanding or cutting this material releases fine silica dust into the air. Inhaling silica dust can lead to serious lung diseases, including silicosis. OSHA sets strict exposure limits for respirable crystalline silica (50 micrograms per cubic meter as an 8-hour time-weighted average). Always wear respiratory protection when working with fiber cement.
Step-by-Step Guide: How to Patch Fiber Cement Siding Safely
Now that you have your tools and materials ready, let’s walk through the exact process for safely patching fiber cement siding while it remains installed on your home.
Step 1: Preparing and Cleaning the Damaged Area
A patch is only as good as the surface prep. If you apply compound over dirt, loose dust, or crumbling siding, the patch will peel away within months.
First, clean the area around the damage using water and a mild detergent to remove dirt, mildew, and chalking paint. Let the surface dry completely.
Next, use a utility knife or a small scraper to remove any loose, crumbling fiber cement from inside the crack or hole. To ensure a permanent bond, we recommend “undercutting” the edges of the hole or scoring the interior of the void with your knife. This creates a slightly wider space inside the hole than on the surface, which acts as a mechanical lock to hold the cured patching compound firmly in place.
Step 2: Applying and Layering the Patching Compound
Once the area is clean and dry, mix your patching compound according to the manufacturer’s instructions.
Using your putty knife, press the compound firmly into the hole or crack. Make sure to pack it tightly to eliminate any air pockets.
- For shallow repairs (under 1/8 inch deep): Apply the compound, slightly overfill the hole, and use your putty knife to feather the edges so they blend smoothly with the surrounding texture.
- For deep repairs (exceeding 1/8 inch deep): Do not try to fill the entire hole at once. Applying too much compound in a single pass leads to shrinkage, cracking, and sagging. Instead, apply the compound in layers. Let each layer partially cure (usually 30 to 60 minutes, depending on the product) before adding the next, until the patch is slightly proud of the siding surface.
Step 3: Sanding, Priming, and Painting for a Flawless Finish
Allow the patch to cure completely according to the product guidelines. Once fully dry, wrap a block with fine-grit sandpaper (120-grit to 220-grit) and gently sand the patch until it is perfectly flush with the surrounding siding. Remember to wear your N95 respirator during this step to protect yourself from silica dust!
After sanding, wipe away any dust with a damp cloth. Because fiber cement is highly alkaline, you must apply a high-quality, alkali-resistant exterior primer over the patched area. Skipping primer will cause the topcoat of paint to blister or peel.
Once the primer is dry, apply two coats of 100% acrylic exterior paint. For the best color match, use a paint roller with a 3/4-inch nap to mimic the factory-applied texture of the surrounding planks. If you want to learn more about achieving a seamless look, check out our guide on fixing fiber cement siding.
Addressing Underlying Moisture Issues and Protecting Your Warranty
While patching a surface-level crack is a great DIY weekend project, we must always address why the damage happened in the first place. If your siding is constantly exposed to water, patching the cracks is just a temporary fix.
When we inspect siding repairs in Walworth, Lake Geneva, and Edgerton, we always look for these common installation and moisture issues:
- Grade Clearance: Fiber cement siding must maintain a minimum of 6 inches of clearance from the soil or finished grade, and at least 2 inches of clearance above hard surfaces like decks, roofs, or patios. If the siding is installed too close to these surfaces, it will wick up moisture like a straw, leading to delamination and crumbling near the bottom courses.
- Improper Joint Gaps: Fiber cement expands and contracts with changes in humidity and temperature. If your Hardie board seams were installed too tightly without backer flashing or proper gapping, the planks will pinch against each other, causing the edges to buckle or crack.
- Warranty Integrity: Leading manufacturers like James Hardie offer incredible 30-year non-prorated warranties on their siding products. However, these warranties require strict adherence to installation guidelines. If you cut a board and fail to prime the raw, unprimed cut edges before installation, the warranty for that section may be voided. Always use high-quality, manufacturer-approved sealants and primers to protect your investment.
Frequently Asked Questions about Siding Repair
Can I use standard wood filler on fiber cement siding?
No, you should never use standard wood filler or drywall compound on fiber cement siding. Wood fillers are not designed to bond with cementitious materials and do not offer the weather resistance needed for exterior application. They will absorb moisture, swell, and fail quickly. Always opt for a cementitious patching compound, acrylic mortar, or exterior-grade epoxy putty.
How do I safely cut fiber cement siding without inhaling silica dust?
To minimize respirable silica dust, we highly recommend using the “score and snap” method with a utility knife or using specialized fiber cement shears instead of a high-speed circular saw. If you must use a power saw, ensure it is equipped with a dust-collection system or a HEPA vacuum attachment, work outdoors with the finished side of the board down, and always wear a properly fitted N95 or P100 respirator.
When should I call a professional for siding repairs?
While minor patching is a manageable DIY task, you should call a professional if:
- The damage is located near active electrical meters, gas lines, or utility penetrations.
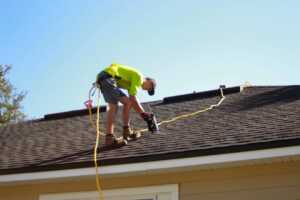
- The repairs require working on a second story or at heights that make you uncomfortable.
- You suspect extensive structural rot or water damage behind the water-resistive barrier.
- You need to replace multiple interlocking planks.
For a deeper dive into evaluating complex siding issues, take a look at this comprehensive siding repair and patching guide.
Conclusion
Patching fiber cement siding is a highly cost-effective way to preserve your home’s curb appeal and protect your wall cavities from moisture. Homes with fiber cement siding receive an impressive 77% return on investment during resale, making it well worth the effort to keep your exterior in top-tier condition.
If you are dealing with minor chips or a misplaced utility hole, the step-by-step patching process outlined above will help you achieve a clean, professional finish. However, if you are facing widespread cracking, suspect water damage behind your planks, or simply want an expert opinion, we are here to help.
At Smith Roofing & Exteriors, we have spent years serving our neighbors in Fort Atkinson, Lake Mills, Jefferson, Burlington, Delavan, Elkhorn, Lake Geneva, Walworth, Edgerton, and throughout Southeastern WI. Our experienced local team uses only superior materials and offers transparent pricing.
Ready to restore your home’s exterior? Contact us today to schedule a professional inspection and receive a clear, honest assessment of your siding. Learn more about our comprehensive Smith Roofing & Exteriors siding services and let us help you protect your home for decades to come.