What You Need to Know Before Starting a Hardie Board Panel Siding Installation
Hardie board panel siding installation is one of the most durable and weather-resistant upgrades you can make to a home’s exterior — especially in harsh Wisconsin winters.
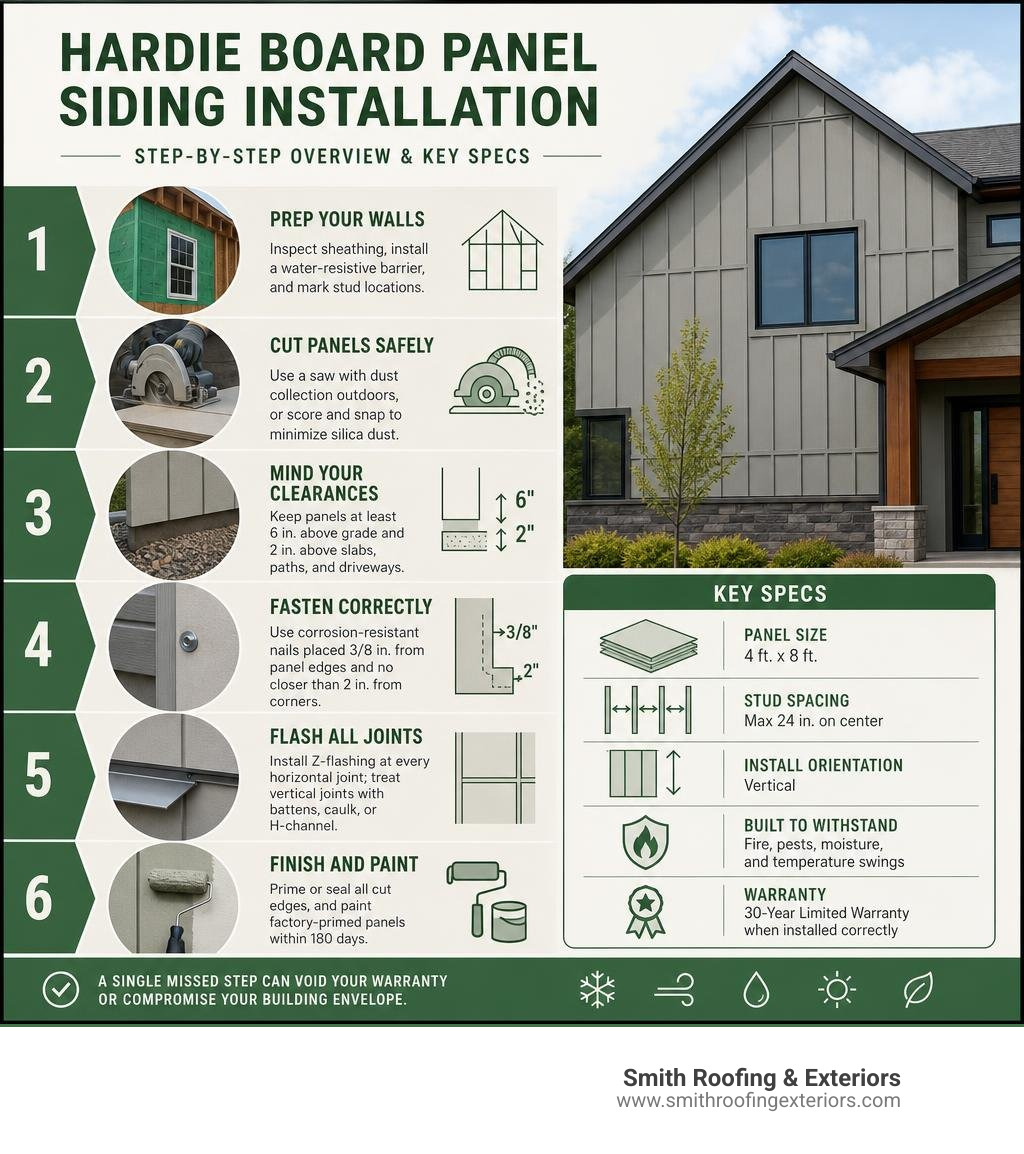
Here’s a quick overview of how it works:
- Prep your walls — inspect sheathing, install a water-resistive barrier, and mark stud locations
- Cut panels safely — use a HardieBlade saw with dust collection outdoors, or score and snap to minimize silica dust
- Mind your clearances — keep panels at least 6 in. above grade and 2 in. above slabs, paths, and driveways
- Fasten correctly — use corrosion-resistant nails placed 3/8 in. from panel edges and no closer than 2 in. from corners
- Flash all joints — install Z-flashing at every horizontal joint; treat vertical joints with battens, caulk, or H-channel
- Finish and paint — prime or seal all cut edges, and paint factory-primed panels within 180 days
These panels are 4×8 fiber cement sheets installed vertically over braced wood or steel studs spaced a maximum of 24 in. on center. They’re tough, fire-resistant, and built to handle pest pressure, moisture, and temperature swings — but only when installed correctly. A single missed step can void your 30-year warranty or compromise your building envelope.
I’m Matt Smith, owner of Smith Roofing & Exteriors, and I’ve guided countless Wisconsin homeowners through hardie board panel siding installation from wall prep all the way to final paint. In this guide, I’ll walk you through every step — so you know exactly what a proper installation looks like.
Hardie board panel siding installation glossary:
Essential Tools and Prep for Hardie Board Panel Siding Installation
Before we dive into the physical installation, we need to talk about the preparation phase. Fiber cement is a premium, high-performance material, which means it requires specific tools and careful handling. Unlike lightweight vinyl siding, 4×8 Hardie panels are dense, heavy, and unforgiving of poor preparation.
To ensure your project goes smoothly and stays within budget, it’s wise to understand the material requirements and overall costs. You can learn more about the financial side of this project in our guide on The Real Cost Of Hardie Panel Siding In 2026.

Proper storage and handling are critical. We always store James Hardie products flat, off the ground, on a level surface, and completely dry. If the panels get wet before installation, they can shrink at the joints after they are nailed down. When moving these heavy 4×8 panels around your jobsite in Fort Atkinson or Lake Geneva, never carry them flat. Always carry them on edge with two people to prevent the panels from cracking or bending under their own weight.
Safety Precautions and Cutting Techniques
Safety is our top priority on any job site. Fiber cement contains respirable crystalline silica. When you cut these panels with a standard circular saw, it releases fine dust that can cause serious respiratory issues if inhaled over time.
To minimize silica dust exposure and comply with OSHA standards, we recommend using one of three approved cutting methods:
- The “Good” Method (Dust Reduction): Use a circular saw equipped with a specialized, low-debris HardieBlade saw blade and cut outdoors so the wind blows the air away from your breathing zone.
- The “Best” Method (Dust Collection): Use an under-8-inch circular saw connected to a HEPA vacuum dust collection system. OSHA considers this method to be below the Permissible Exposure Limit (PEL) for silica, meaning you don’t need additional respiratory protection when cutting outdoors.
- The “Low-Dust” Method (Indoors): Use manual fiber cement shears or the score-and-snap method. Scoring the panel with a carbide-tipped knife and snapping it over a clean edge produces virtually no dust, making it the perfect choice for quick indoor adjustments.
No matter which method you choose, always wear a NIOSH-approved N-95 respirator when cutting, drilling, or handling these materials. For detailed manufacturer instructions on safe handling, consult the HardiePanel Vertical Siding – Installation Instructions.
Wall Preparation and Weather Barriers
You cannot simply slap Hardie panels onto bare studs or old sheathing and hope for the best. The underlying wall assembly must be flat, square, and completely dry. Any bowing in your studs will telegraph directly through the rigid fiber cement panels, leaving you with an uneven finish.
First, install a high-quality water-resistive barrier (WRB) over your sheathing, overlapping the seams according to local building codes. In moist, cold, or highly variable climates like Southeastern Wisconsin—including Edgerton, Jefferson, and Lake Mills—proper wall drainage is non-negotiable.
Depending on your local climate zone, James Hardie outlines specific drainage and rainscreen requirements:
- Dry Climates: Standard WRB is sufficient.
- Moist/Marine Climates: A drainage plane or textured WRB with at least 90% drainage efficiency is required.
- Severe Wind-Driven Rain Climates: A full rainscreen system with a minimum 3/8-inch air gap (using wood or plastic furring strips) must be installed. This air gap allows trapped moisture to drain away and evaporate, protecting your home’s framing from rot.
Investing in proper moisture management pays off in the long run. Discover how these structural choices impact your utility bills by reading about How A Siding Replacement Can Make A Difference In Energy Efficiency.
General Requirements and Clearance Specifications
HardiePanel vertical siding is an incredibly versatile material. In fact, it is recognized under the ICC-ES Evaluation Report ESR-1844 as an approved alternative to the 2006, 2009, 2012, and 2015 International Residential and Building Codes. However, the rules change slightly depending on whether you are working on a single-family home or a commercial/multifamily building.
For single-family residential projects, panels are typically fastened directly to wood or steel studs spaced a maximum of 24 inches on center. On multifamily or commercial buildings, wind load requirements are much stricter. Engineers must consult the ESR-1844 report to determine the exact fastener spacing, stud gauge (typically 20-16 gauge for steel framing), and sheathing thickness required to withstand localized wind pressures for buildings up to 85 feet in mean roof height.
Clearance and Flashing Rules
Water is the ultimate enemy of any siding material. To keep moisture from wicking into your walls, James Hardie mandates strict clearance and flashing rules. Ignoring these rules is the fastest way to void your warranty and invite rot.
- Ground Clearance: Siding must remain a minimum of 6 inches above the finished soil grade. Ensure the adjacent grade slopes at least 6 inches downward within the first 10 feet away from your foundation.
- Slabs, Paths, and Steps: Maintain a minimum 2-inch clearance between the bottom edge of the siding and any hard surfaces like concrete driveways, steps, or patios. For detailed visual guidelines, check out the official Siding to Slabs, Path, Steps document.
- Roof Lines: Keep a 2-inch clearance between the siding and roof shingles.
- Kickout Flashing: At roof-to-wall intersections, install a kickout flashing angled between 100° and 110°. This diverts water away from the wall and directly into your gutters.
- Horizontal Joints: Hardie panels cannot bridge floors. You must install a metal Z-flashing at all horizontal joints between floors, leaving a 1/4-inch drainage gap above the flashing. Never caulk this horizontal gap.
Properly managing these transitions prevents water from finding its way behind your siding. To avoid common pitfalls, read our detailed guide: Don’t Let Your Hardie Board Seams Become A Nightmare.
Fastener Types and Placement Rules
To hold these heavy panels securely against Wisconsin’s strong winds, you must use the right fasteners. We recommend hot-dipped galvanized or stainless steel nails. If you are fastening to steel studs, use corrosion-resistant self-tapping screws.
When nailing, your pneumatic nailer must be equipped with a flush-mount attachment. Drive the fasteners perpendicular to the siding so the nail heads sit snug and flush against the surface. Under-driven nails will leave the panel loose, while over-driven nails will countersink and fracture the fiber cement core, destroying its holding power.
| Fastener Type | Substrate | Edge Distance | Corner Distance | Max Spacing |
|---|---|---|---|---|
| 6d Common Galvanized Nails (0.113″ shank) | Wood Studs | Min. 3/8 in. | Min. 2 in. | 6 in. to 12 in. o.c. |
| HD Ringshank Nails (0.083″ shank) | Wood Studs / OSB | Min. 3/8 in. | Min. 2 in. | 6 in. to 12 in. o.c. |
| No. 8 or No. 10 Ribbed Siding Screws | Steel Studs (20-16 ga) | Min. 3/8 in. | Min. 2 in. | 6 in. to 12 in. o.c. |
Note: Always position your fasteners at least 3/8 in. from the panel edges and no closer than 2 in. away from the corners to prevent cracking.
Executing the Installation and Joint Treatments
Now that the prep work, clearances, and tools are in order, it’s time to execute the physical hardie board panel siding installation.
If you are using architectural panels to achieve a clean, contemporary aesthetic, you should review the specific trim and layout guides found in How to install Hardie® Architectural Panels.
Step-by-Step Hardie Board Panel Siding Installation Process
- Plan Your Layout: Map out your wall before installing the first panel. Plan your joint locations so they land directly on studs. If you are using textured panels like Sierra 8, we highly recommend installing double studs at the panel joints. This gives you a wider nailing surface and prevents you from having to drive nails directly through the decorative grooves.
- Snap Control Lines: Use a level and a chalk line to establish a perfectly level starter line around the base of your home.
- Cut and Treat Edges: Cut your panels to size, keeping your clearances in mind. Every time you make a field cut, you expose the raw fiber cement core. You must prime, paint, or caulk all field-cut edges before hanging the panel to seal out moisture.
- Hang and Align: Lift the first panel into place. Leave the appropriate gap at the bottom (2 inches above concrete, 6 inches above soil). Use a level to ensure the vertical edge is perfectly plumb.
- Fasten the Panel: Beginning at the top and working your way down, drive your fasteners along the studs. Space your fasteners according to your local wind-load requirements (typically every 6 to 12 inches along the perimeter and intermediate studs). Remember to keep nails 3/8 inch from the edge and 2 inches from the corners.
If you ever run into issues with uneven walls or minor panel damage during the process, don’t panic. You can find helpful troubleshooting tips in our guide on Fixing Fiber Cement Siding For A Flawless Exterior.
Managing Vertical and Horizontal Joints
How you treat the joints between your panels determines both the weather resistance and the final look of your home.
- Vertical Joints: You have a few professional options for vertical joints. You can install the panels in moderate contact with one another. Alternatively, you can cover the joints with decorative wood or PVC batten strips to create a classic board-and-batten look. For a highly modern, industrial aesthetic, you can use metal H-channel jointers. If you are using primed panels, you can also leave a 1/8-inch gap and fill it with a high-quality ASTM C920 polyurethane caulk.
- Horizontal Joints: As mentioned earlier, horizontal joints require metal Z-flashing. Never caulk the horizontal gap above the Z-flashing; this gap must remain open (at least 1/4 inch) to allow water to escape.
For a deeper dive into preventing joint leaks and choosing the right sealants, read Don’t Let Your Hardie Board Seams Become A Nightmare.
ColorPlus Technology vs. Primed Panels
James Hardie offers two main finish options: factory-primed panels and ColorPlus® Technology panels.
- Primed Panels: These arrive ready for paint. However, the clock is ticking once they are installed. You must apply a high-quality, 100% acrylic exterior topcoat within 180 days of installation (or 90 days for unprimed products) to protect the substrate and preserve your warranty.
- ColorPlus Technology: These panels feature a factory-applied, oven-baked finish that resists fading, chipping, and cracking. They come wrapped in a protective laminate film that you should leave in place during cutting and fastening, removing it only after the installation is complete.
If you scrape or nick a ColorPlus panel, you cannot use standard paint for touch-ups. You must use a manufacturer-approved ColorPlus touch-up pen. That touch-up pens are only intended for small nicks and scratches smaller than a dime; larger damaged areas will require replacing the entire panel. Additionally, never caulk the joints on ColorPlus panels, as the caulk will weather differently than the factory-baked finish, creating unsightly streaks over time.
To compare the long-term value and upfront investment of these finish options, check out our resource: How Much Does It Cost To Reside A House With Hardie Board.
Deciding Between DIY and Professional Siding Installation
Hanging vertical fiber cement panels is a major home improvement project. While the idea of tackling a DIY installation is tempting, you must weigh the physical demands against the need for structural precision.
A single 4×8 Hardie panel is 5/16 of an inch thick and weighs roughly 75 pounds. Trying to hold a heavy, floppy panel perfectly plumb while standing on a ladder, maintaining a 1/4-inch gap over your Z-flashing, and nailing it off is incredibly difficult—if not outright dangerous—for a solo installer.
Furthermore, James Hardie’s industry-leading 30-year non-prorated limited warranty is strictly tied to proper installation. If a DIYer miscalculates a clearance, over-drives a row of nails, or forgets to flash a joint, the manufacturer will deny any future warranty claims.
Before committing to a DIY project, it’s helpful to recognize when your home’s exterior is truly in need of a full replacement. Review the warning signs in 5 Signs It’s Time To Install New Siding On Your Home.
When to Hire a Pro for Hardie Board Panel Siding Installation
If you want absolute peace of mind, hiring a professional siding replacement company is the smartest path forward.
At Smith Roofing & Exteriors, our local team brings years of specialized experience to every job site in Fort Atkinson, Burlington, Delavan, Elkhorn, Walworth, and across Southeastern Wisconsin. We know exactly how to handle the unique wind loads and freezing temperatures of our local climate. We have the heavy-duty staging, geared panel lifts, and specialized dust-collection cutting tools required to get the job done quickly, safely, and flawlessly.
If you’re noticing signs of wear on your current exterior, it might be time to call in the experts. Learn more about what to look for in our guide: Signs It’s Time To Call A Siding Replacement Company.
Frequently Asked Questions about HardiePanel Siding
How heavy are 4×8 Hardie panels and can one person install them?
A standard 4×8 HardiePanel is 5/16 inches thick and weighs around 75 pounds. Because of their size, weight, and rigidity, they are highly prone to cracking if bent. It is virtually impossible for one person to install them safely and accurately. You need at least two people to carry and position the panels, and using a geared panel lift (similar to a drywall lift) is highly recommended.
What is the best way to treat the vertical joints between panels?
The best treatment depends on your aesthetic goals. For a rustic modern farmhouse look, covering the joints with HardieTrim batten boards is the most popular choice. For a clean, modern look, you can install them in moderate contact or use sleek metal H-channel jointers. If you are using primed panels, you can leave a 1/8-inch gap and seal it with a high-quality polyurethane caulk (though caulking is not recommended for ColorPlus products).
How soon must James Hardie products be painted after installation?
Factory-primed James Hardie panels must be painted with a 100% acrylic exterior topcoat within 180 days of installation. If you are using unprimed fiber cement products, they must be painted within 90 days. Failing to paint the panels within these windows exposes the substrate to the elements and will void your warranty.
Conclusion
A professional hardie board panel siding installation is one of the most rewarding investments you can make in your home. It delivers unmatched fire resistance, pest protection, and curb appeal that will last for decades.
Whether you choose the rustic charm of board-and-batten or the clean lines of contemporary architectural panels, getting the installation details right is the key to protecting your home and securing your 30-year warranty.
If you are ready to upgrade your home’s exterior but prefer to leave the heavy lifting, precise flashing, and safety risks to the professionals, we are here to help. Contact us at Smith Roofing & Exteriors today for transparent pricing and expert installation services across Southeastern Wisconsin. If you are still exploring different materials and styles for your home, also Explore our vinyl siding options to find the perfect fit for your budget and design goals.