Why Your Finished Attic Needs Proper Ventilation
Finished attic ventilation is one of the most overlooked — and most critical — parts of converting attic space into livable square footage. Here’s what you need to know right away:
Quick Answer: How to ventilate a finished attic
- Vented approach: Maintain a 1-inch airway between insulation and roof deck using rafter baffles, pair soffit intake vents with ridge exhaust vents, and build a plenum above flat ceilings for lateral airflow.
- Vented approach: Seal the roof deck with air-impermeable spray foam, bring the attic inside the conditioned envelope, and provide HVAC airflow at 1 CFM per 50 sq ft of attic floor area.
- Either way, follow IRC 2024 Section R806 and work with a licensed contractor.
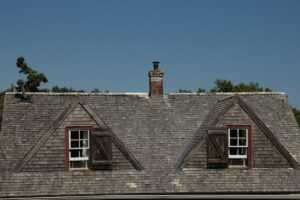
Finishing an attic is one of the best ways to add livable square footage to your home without building an addition. But it comes with a hidden risk that most homeowners don’t discover until it’s too late.
When an attic is unfinished, air can move freely between rafters, insulation sits on the floor, and vents keep temperatures and moisture in check. The moment you finish that space — adding drywall, flooring, and insulation between the rafters — you change everything about how air moves through it.
Moisture has nowhere to go. Heat gets trapped. And by the time you notice mold on the drywall or smell something dank, the damage to your roof sheathing may already be done.
That’s the challenge this guide is here to help you solve.
I’m Matt Smith, owner of Smith Roofing & Exteriors, and I’ve spent years helping Wisconsin homeowners address the roofing and ventilation problems that stem from improperly finished attics — making finished attic ventilation one of the most important conversations I have with clients. Let’s walk through everything you need to get it right.

Finished attic ventilation glossary:
Why Proper Ventilation is Critical for Finished Attics
When you close off a space to make a bedroom, playroom, or home office, you might think you are simply upgrading the interior. In reality, you are changing the thermal dynamics of your entire house.
In an unfinished attic, the air space acts as a buffer. In winter, cold air sweeps through the attic, keeping the roof deck cold. In summer, passive vents allow rising heat to escape. Once you finish that space, you place insulation directly against the sloped roof deck (rafters) and cover it with drywall. Without a strategic ventilation plan, this configuration traps moisture and extreme heat right against your roof’s wooden structure.

Moisture Control and Mold Prevention
Every day, a typical family generates gallons of water vapor through cooking, bathing, laundry, and breathing. This warm, moist air naturally rises through the house — a phenomenon known as the stack effect. In an unventilated finished attic, this moisture gets trapped behind the drywall.
When this warm vapor hits the cold wooden underside of your roof sheathing in the winter, it condenses into liquid water. Over time, this hidden condensation leads to wood rot, structural decay, and toxic mold growth. Because this happens behind your finished walls, you won’t see it until the rot has progressed to a point where major structural repairs are required.
Fighting the Formation of Ice Dams
For homeowners in Southeastern Wisconsin — from Fort Atkinson and Jefferson to Lake Geneva and Delavan — winter brings heavy snow and freezing temperatures. Proper attic ventilation is your primary defense against ice dams.
Ice dams form when warm air escapes from the living space into the attic, warming the roof deck and melting the snow above. This melted water runs down the roof until it reaches the cold eaves, where it refreezes. As the ice builds up, it creates a dam that traps water behind it. This trapped water eventually backs up under your shingles, leaking into your newly finished ceiling and walls. Keeping a continuous stream of cold outdoor air moving directly beneath the roof deck prevents the roof from warming up, stopping ice dams before they start.
Protecting Your Roof Durability and Home Comfort
Relentless summer heat can cause attic temperatures to soar to 150°F or even 160°F in under-ventilated homes. This extreme heat bakes your shingles from the inside out, causing them to curl, crack, and degrade prematurely. In fact, shingles subjected to these temperatures repeatedly can age up to twice as fast as those on a properly ventilated roof.
Furthermore, this heat radiates down through your ceiling, forcing your air conditioning system to run constantly and making your upper floor feel like a sauna. Proper ventilation lowers attic temperatures to a manageable 100°F to 115°F, protecting your roofing materials and keeping your living space comfortable. You can read more about how this works in The Complete Guide to Roof Ventilation.
Common Signs of Inadequate Finished Attic Ventilation
It can be difficult to tell if your attic is struggling to breathe when everything is hidden behind drywall. However, your home will usually drop several hints if the ventilation is failing. Keep an eye out for these common warning signs:
- Unbearable Summer Heat Buildup: If your finished attic is consistently 10 to 15 degrees hotter than the rest of your home, and your AC system cannot keep up, heat is likely trapped in the roof structure.
- Musty, Dank Odors: A persistent musty smell is a classic sign of hidden mold or mildew growing behind your knee walls or ceiling drywall.
- Damp Drywall or Water Stains: If you notice damp spots, water rings, or soft drywall near the joints of your ceiling and knee walls, condensation is likely pooling on the backside of the gypsum board.
- Peeling Paint or Wallpaper: High humidity levels in the attic space will cause paint to blister and wallpaper seams to peel away from the wall.
- Shingle Curling and Buckling: Take a look at your roof from the ground. If you notice shingles curling at the edges, losing granules rapidly, or buckling, they are likely being baked by trapped heat.
If you notice any of these signs, it is critical to address them quickly. You can use our Ultimate Checklist for Roof Inspection to evaluate your roof’s condition or contact a professional to inspect the space.
Vented vs. Unvented: Choosing the Right Finished Attic Ventilation System
When planning a finished attic project, you must choose between two distinct design philosophies: a vented attic or an unvented (conditioned) attic. Both are code-compliant, but they function in completely opposite ways.
| Feature | Vented Attic System | Unvented (Conditioned) Attic System |
|---|---|---|
| Insulation Location | Between rafters (with air gap) and flat collar ties | Directly against the underside of the roof deck |
| Airflow Strategy | Passive or mechanical airflow from eaves to ridge | Completely sealed; zero outdoor airflow |
| Moisture Management | Moisture is flushed out by continuous outdoor air | Moisture is controlled by the home’s HVAC system |
| Best Suited For | Standard rafters, budget-friendly retrofits | Complex roof shapes, spray foam applications |
| HVAC Requirements | Ductwork must be heavily insulated | Ductwork is kept inside conditioned space |
The Vented Attic Approach
This is the traditional method. It relies on passive ventilation to wash the underside of the roof deck with outside air. Cool air enters through soffit vents at the eaves, travels up through rafter bays behind the drywall, and exits through a ridge vent at the peak.
To make this work in a finished space, you must install rigid foam baffles in every single rafter bay to maintain a continuous 1-inch airway between the insulation and the roof sheathing. If you have a flat ceiling portion at the top of your finished room, you must also frame a “plenum” (a small open air space) above the ceiling to allow the air from the rafters to move laterally and escape through the ridge vent.
The Unvented (Conditioned) Attic Approach
In an unvented system, you eliminate all vents — including ridge, gable, and soffit vents. Instead, you apply air-impermeable insulation, typically closed-cell or open-cell spray foam, directly to the underside of the roof sheathing. This seals the attic completely and brings the entire space inside the thermal envelope of your home.
Because the attic is now part of the conditioned space, you do not need to vent it to the outdoors. Moisture and temperature are managed by your home’s HVAC system. This is an excellent option for complex roofs with dormers and valleys where maintaining a continuous passive ventilation path is physically impossible. You can read a detailed breakdown of this conversion process in the Vented to Unvented Attic Guide.
How to Calculate Net Free Area for Finished Attic Ventilation
If you choose the vented attic path, you must calculate the amount of ventilation needed to satisfy local building codes and ensure proper airflow. This is measured in Net Free Area (NFA) — the actual, unobstructed open area through which air can pass (accounting for screens, louvers, and grilles).
The 1:150 Rule vs. The 1:300 Rule
The International Residential Code (IRC) Section R806 dictates the minimum ventilation requirements:
- The Standard 1:150 Rule: You must provide 1 square foot of NFA for every 150 square feet of attic floor space.
- The Exceptional 1:300 Rule: You can reduce the ventilation requirement to 1 square foot of NFA for every 300 square feet of attic floor space, provided that:
- A Class I or II vapor retarder is installed on the warm-in-winter side of the ceiling.
- The ventilation system is properly balanced, with 40% to 50% of the venting area located in the lower portion of the roof (intakes) and 50% to 60% located in the upper portion (exhaust).
To ensure compliance with the latest standards, refer to the IRC 2024 Attic Ventilation Requirements.
Sample Calculation
Let’s calculate the ventilation needs for a finished attic with a footprint of 1,500 square feet using the 1:150 rule:
- Calculate Total NFA Required:
$$\text{1,500 sq ft} \div 150 = \text{10 sq ft of total NFA}$$ - Convert to Square Inches:
$$\text{10 sq ft} \times 144 = \text{1,440 square inches of total NFA}$$ - Balance the System (50% Intake / 50% Exhaust):
- Soffit Intake Vents: 720 square inches of NFA needed.
- Ridge Exhaust Vents: 720 square inches of NFA needed.
Always consult the manufacturer’s data sheets for your specific vents to find their exact NFA rating. For example, if your ridge vent provides 18 square inches of NFA per linear foot, you would need 40 feet of ridge vent to meet your 720-square-inch exhaust requirement ($720 \div 18 = 40$).
Insulation, Air Sealing, and Building Code Compliance
Before you put up a single sheet of drywall or install insulation, you must address air sealing. Many homeowners assume that insulation stops airflow, but fiberglass and cellulose are actually highly air-permeable. Warm, moist indoor air will pass right through them and condense on your cold roof deck.

Air sealing involves using expanding foam, caulk, and flashing to seal every gap, crack, and penetration between the living space and the unconditioned areas. This includes sealing around light fixtures, electrical boxes, chimney clearances, and top plates of partition walls. The U.S. Department of Energy provides a highly detailed sequence of operations for this in the DOE Guide to Attic Air Sealing.
Meeting Local R-Value Standards
In Wisconsin’s cold climate zones, the code typically requires R-38 to R-49 insulation in ceilings, with some new construction standards pushing toward R-60.
- Fiberglass Batts: Deliver roughly R-3 per inch. To hit R-38, you need nearly 13 inches of thickness, which is far deeper than standard $2 \times 8$ or $2 \times 10$ rafters.
- Spray Foam: Closed-cell spray foam delivers up to R-7 per inch, allowing you to hit high R-values in tight rafter spaces while simultaneously acting as an air barrier.
For professional guidance on local material options, check out this guide on Insulation for Attics, Walls, and Crawlspace Fort Atkinson WI.
Maintaining the Airway with Baffles and Plenums
If you are using a vented design, you must ensure that your insulation does not choke off your ventilation. The law of physics is simple: if air cannot enter at the bottom and exit at the top, your ventilation system is dead.
Installing Rafter Baffles
Rafter baffles (or wind baffles) are rigid plastic or foam channels installed directly against the roof sheathing before insulation is added. They guarantee a continuous, code-required 1-inch airway from your soffit vents up to the peak of your roof. They also prevent blown-in insulation from washing over and blocking your soffit vents.
Designing a Collar Tie Plenum
Most finished attics are framed with a small flat ceiling at the very top, supported by collar ties. If you run your insulation up the sloped walls and across this flat ceiling, you create a small triangular unconditioned space above the ceiling.
To keep air moving, you must build a “plenum” — a clear, open airspace above this flat ceiling that connects the rafter bays on both sides of the roof. This allows air entering from either side of the house to rise through the rafters, meet in the plenum, and exhaust through a continuous ridge vent. You can read more about selecting the right venting systems for this setup in our article on To Vent or Not to Vent: Top Energy Efficient Roof Vents Reviewed.
HVAC and Plumbing Integration in Finished Spaces
Converting an attic into a bedroom or living space means you have to bring utilities up into the roofline. This presents unique challenges for both heating and cooling, as well as plumbing ventilation.
The HVAC Challenge: Why Mini-Splits Win
Extending your existing central HVAC system up into an attic is often a recipe for disappointment. Attics have extreme heating and cooling loads, and your existing furnace and AC unit were likely not sized to handle the extra square footage. Furthermore, running bulky ductwork through tight knee walls is incredibly difficult and reduces valuable living space.
A ductless mini-split system is almost always the superior choice for finished attics. They provide zoned heating and cooling, require zero ductwork, and are highly energy-efficient.
Plumbing and Exhaust Ventilation
If you are adding a bathroom to your finished attic, you must handle plumbing vents and exhaust fans with extreme care.
- Plumbing Stacks: Plumbing vent pipes must extend all the way through the roof to the outdoors. Never terminate a plumbing vent inside an attic space.
- Bathroom Exhaust Fans: Bathroom fans remove massive amounts of hot, humid air. They must be ducted directly to the outside using insulated ductwork (at least R-6 or R-8 in cold climates) to prevent condensation from forming inside the duct. Never vent a bathroom fan into a soffit or directly into the attic space.
For high-performance exhaust terminations, systems like the Panasonic EZSoffitVent™ System provide a low-resistance path that vents directly through the soffit while preventing cold backdrafts. You can read more about avoiding critical mistakes in our guide: Don’t Blow It: The Ultimate Guide to Bathroom Roof Ventilation.
Frequently Asked Questions
Can I use a powered attic fan in a finished attic?
Generally, we do not recommend using powered attic fans in finished, conditioned attics. If your attic is finished and sealed, a powerful exhaust fan can create negative pressure (depressurization). This negative pressure will pull conditioned air right out of your living space through tiny gaps in your drywall, electrical outlets, and light fixtures, driving up your energy bills and potentially backdrafting combustion appliances like water heaters.
How does attic insulation affect my energy bills?
Attic insulation has a massive impact on your utility bills. The U.S. Department of Energy estimates that homeowners can save up to 15% on heating and cooling costs by properly insulating and air sealing their attics, crawl spaces, and basement rim joists. In our cold Wisconsin winters, keeping heat where it belongs — inside your living space — prevents your furnace from running continuously.
What is the difference between passive and mechanical ventilation?
Passive ventilation relies entirely on natural forces — namely, the stack effect (warm air rising) and wind pressure — to move air through your attic via soffit and ridge vents. Mechanical ventilation uses motorized fans, whole-house fans, or Energy Recovery Ventilators (ERVs) to actively push or pull air. While passive ventilation is highly reliable and costs nothing to operate, mechanical systems are sometimes necessary for complex rooflines or highly airtight modern homes.
Conclusion
Finishing your attic is a fantastic way to unlock the hidden potential of your home, but it requires a careful, scientific approach to ventilation, insulation, and air sealing. Cutting corners on your finished attic ventilation can lead to mold, structural rot, ice dams, and a roof that fails years before its time.
Whether you are in the planning stages of an attic conversion or suspect that an existing finished space is causing moisture issues on your roof, our team at Smith Roofing & Exteriors is here to help. We provide expert roofing, siding, and gutter services across Southeastern Wisconsin, including Fort Atkinson, Lake Mills, Jefferson, Burlington, Delavan, Elkhorn, Lake Geneva, Walworth, and Edgerton.
We can evaluate your roof’s ventilation structure, install high-performance ridge and soffit systems, and ensure your home remains safe, dry, and energy-efficient for years to come. To learn more about how your roof impacts your home’s performance, check out our guide on The Role of Roofing in Energy Efficiency or contact us today to schedule a professional consultation.