What Happens During an Insurance Adjuster Roof Inspection?
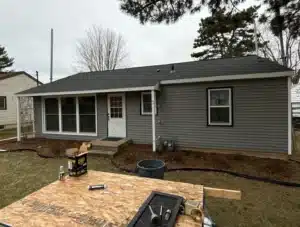
When the insurance company’s field adjuster pulls up to your driveway, the clock starts ticking. Most insurance adjuster roof inspections take between 30 and 60 minutes depending on the size of your house, the steepness of the pitch, and the complexity of the damage.
During this window, the adjuster is evaluating the total physical impact of a covered peril (like wind or hail). They will walk the property, set up a ladder, and systematically review several critical areas:
- The Exterior Roof Deck: Checking shingles, ridge caps, and valleys for uplift, missing tabs, or impact bruising.
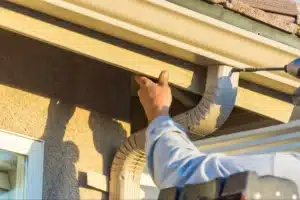
- Soft Metals and Collateral: Inspecting aluminum gutters, box vents, flashing, pipe boots, and even metal patio furniture or window screens. Soft metals act as “collateral evidence” proving hail fell with force.
- The Attic Interior: Looking for moisture stains, structural daylight, or saturated insulation. Checking the underside of the roof deck is often the easiest way to confirm active water intrusion.
For a broader look at how claims interact with roof maintenance, read The Ultimate Guide to Roof Repair Insurance and Claims.
Purpose of an Insurance Adjuster Roof Inspection vs. Independent Inspection
It helps to understand who everyone works for. The insurance adjuster’s primary mandate is to evaluate liability and policy coverage on behalf of the insurance company. They determine what the carrier is legally obligated to pay under your policy contract.
An independent inspection, on the other hand, provides an unbiased evaluation focused purely on the physical integrity of your roofing system. While an adjuster checks boxes for carrier liability, an independent professional checks to ensure your home will actually shed water and remain structurally sound.
To learn more about the technical side of carrier guidance, see the Insurance Adjuster Roof Inspection: 2026 Homeowner Guide. If you need an objective physical evaluation before calling your carrier, check out The Ultimate Guide to Finding a Roof Inspection Near Me.
What Adjusters Look For: Covered Storm Damage vs. Wear and Tear
Insurance policies cover sudden, accidental physical loss—not natural aging. One of the adjuster’s main jobs is distinguishing storm damage from normal wear and tear:
- Hail Damage: Creates dark, circular bruises where protective granules have been knocked away, exposing the underlying asphalt mat. Hail strikes transfer kinetic energy that fractures the internal fiberglass matting.
- Wind Damage: Characterized by lifted shingle tabs, horizontal creasing near the top seal strip, or completely missing shingles torn away by gale-force gusts.
- Wear and Tear / Exclusions: Uniform granule loss inside gutters from thermal expansion, curling shingle edges from attic heat, manufacturing flaws, or pre-existing rot from lack of routine maintenance.
For help spotting these differences on your own shingles, see our guide on How to Spot Hail Damage and Get Your Insurance to Pay.
Decoding the Adjuster Protocol: Test Squares and Functional Damage
Insurance adjusters don’t just glance at a roof and make a wild guess. They follow standard forensic standards—most notably protocols developed by Haag Engineering—to turn damage assessment into a measurable formula.
The 4-Square Test Explained
The industry standard method for counting hail impact is the 4-square test. An adjuster selects representative areas on your roof, uses chalk to outline 10-foot by 10-foot boxes (100 square feet each), and counts the number of functional hail hits inside that square.
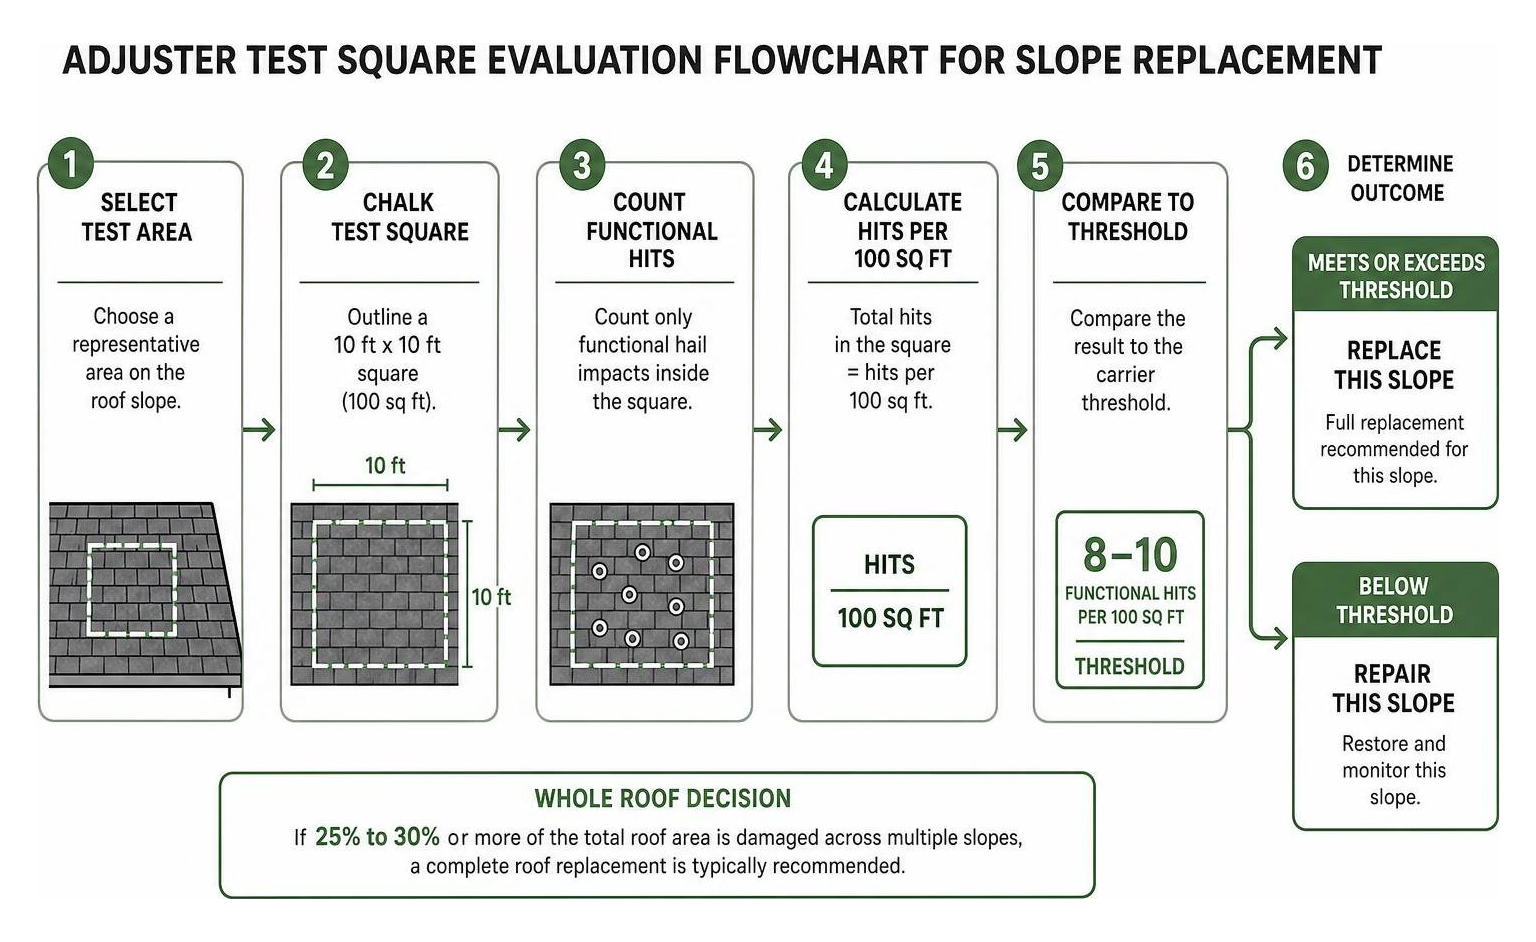
Generally across major insurance carriers, finding 8 to 10 functional hits per 100 square feet on a given slope triggers a full replacement recommendation for that specific slope. If more than 25% to 30% of the entire roof deck is damaged across multiple slopes, adjusters will typically approve a complete roof replacement rather than localized restorations.
For an in-depth breakdown of these forensic standards, reference the Inspector Roofing Protocols Book.
Functional vs. Cosmetic Damage: The Critical Distinction
This is where many insurance disputes begin. Insurance companies draw a sharp line between functional damage and cosmetic damage:
- Functional Damage: Storm damage that compromises the shingle’s ability to shed water or shortens its expected functional lifespan (such as a fractured asphalt mat or missing seal strip).
- Cosmetic Damage: Dents, scratches, or marks that change the roof’s appearance without affecting its performance or waterproofing capabilities.
Many modern policies include cosmetic damage exclusions—especially for metal roofs, vents, and gutters. If a hailstone dents an aluminum ridge cap or metal roof panel but doesn’t cause a leak or structural rupture, the carrier may refuse payment under cosmetic endorsement clauses.
To explore how this affects custom metal or specialty roofing systems, read Hail No: A Guide to Assessing Colorbond Roof Damage and Insurance Payouts.
Preparation and Collaboration: Getting Ready Before the Adjuster Arrives
Preparation transforms you from a passive bystander into an informed advocate. Before your insurance adjuster roof inspection, gather historical evidence:
- NOAA Weather Reports: Pull local weather data verifying storm dates, wind speeds, or hail sizes in your area (e.g., Jefferson or Rock County).
- Date-Stamped Photos: Collect photos of hail on your deck, dented vehicles, or fallen tree limbs taken right after the event.
- Pre-Loss Documentation: Gather home purchase closing photos, old repair receipts, or home inspection reports to prove the roof was in good condition prior to the storm.
Review our complete checklist in the Ultimate Checklist for Roof Inspection.
Why Your Contractor Should Attend the Insurance Adjuster Roof Inspection
You should never have to handle an adjuster meeting alone. Industry data indicates that insurance claims with a professional roofing contractor present on-site during the adjuster meeting settle 22% to 35% higher than solo inspections.
Having your contractor present ensures:
- Overlooked damage on steep or hard-to-see slopes gets pointed out in real-time.
- Soft metal damage and attic moisture are jointly verified.
- The initial scope of work includes accurate material measurements, local building code requirements, and proper tear-off labor.
Read our practical tips in Getting Your Roof Replaced by Insurance Without Losing Your Mind.
Homeowner Pre-Inspection Checklist
Before the adjuster arrives at your home, complete these essential steps:
- [ ] Clear Attic Access: Ensure the ladder dropdown or attic hatch is clear of clutter so the adjuster can check the roof decking from underneath.
- [ ] Secure Pets & Unlock Gates: Give the adjuster easy, safe access around the full perimeter of your property.
- [ ] Locate Claim Numbers: Keep your insurance policy claim number, adjuster contact details, and loss date written down.
- [ ] Document Interior Leaks: Mark water spots on ceilings or walls with painter’s tape and note when they first appeared.
- [ ] Clean Surrounding Grounds: Move outdoor furniture or patio items away from the drip line so ground collateral is clear.
For a step-by-step walk-through of the entire claim filing sequence, see How to File Roof Insurance Claims in 7 Easy Steps.
Understanding the Math: RCV, ACV, Deductibles, and Scope of Work
Understanding your settlement check requires understanding insurance accounting logic. Adjusters estimate repair costs using estimating software like Xactimate, which calculates local material prices, labor costs, and removal fees.
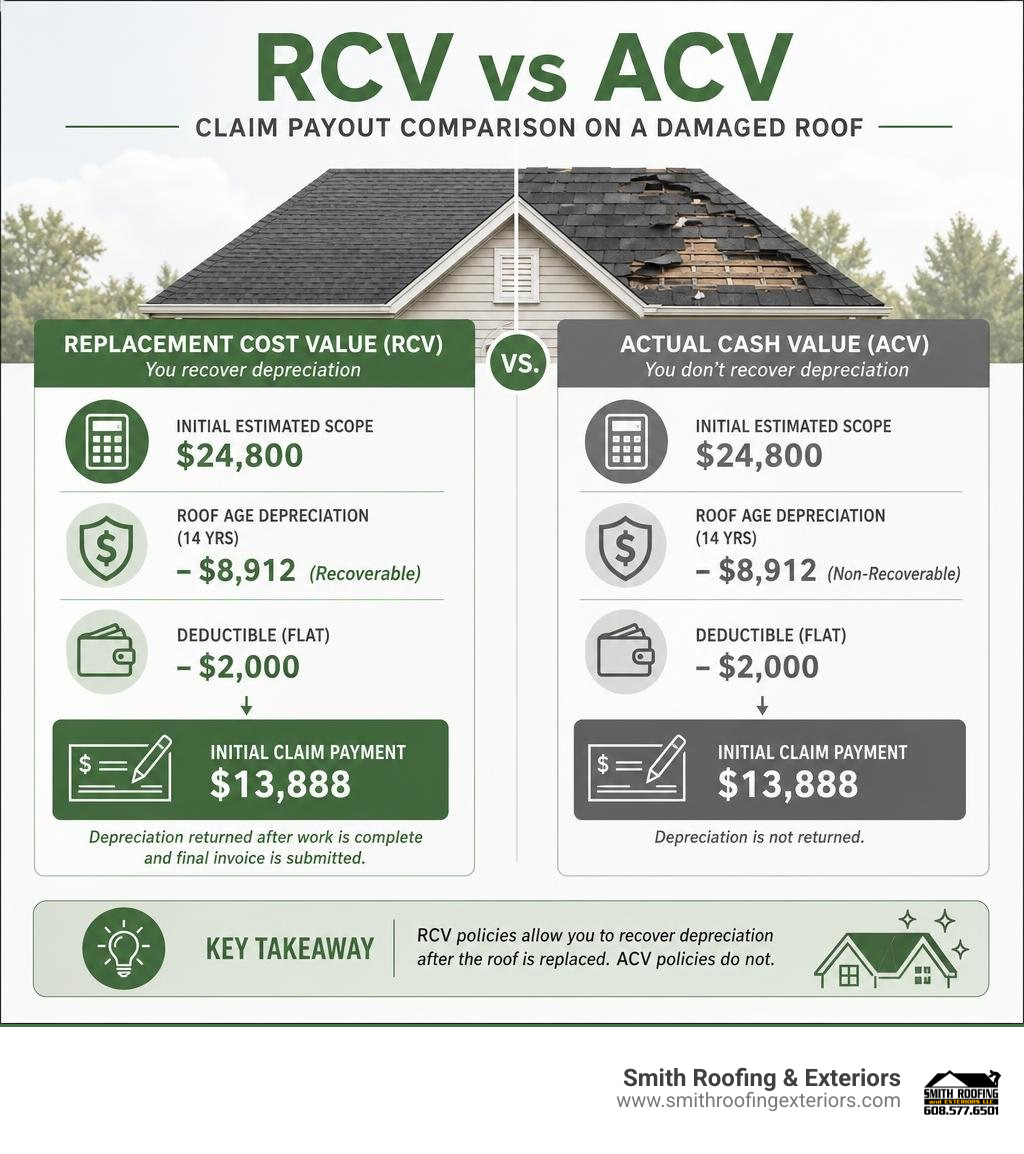
| Policy Factor | Replacement Cost Value (RCV) Policy | Actual Cash Value (ACV) Policy |
|---|---|---|
| Initial Estimated Scope | $24,800 | $24,800 |
| Roof Age Depreciation (14 Yrs) | -$8,912 (Recoverable) | -$8,912 (Non-Recoverable) |
| Deductible (Flat) | -$2,000 | -$2,000 |
| Initial Payment Check | $13,888 | $13,888 |
| Second Check (After Work) | $8,912 | $0 |
| Total Out-of-Pocket Cost | $2,000 (Deductible only) | $10,912 (Deductible + Depreciation) |
For more details on handling line items and scope paper, read Estimate Escape Room: Why Contractors Need Your Insurance Paperwork.
RCV vs. ACV Payout Calculations
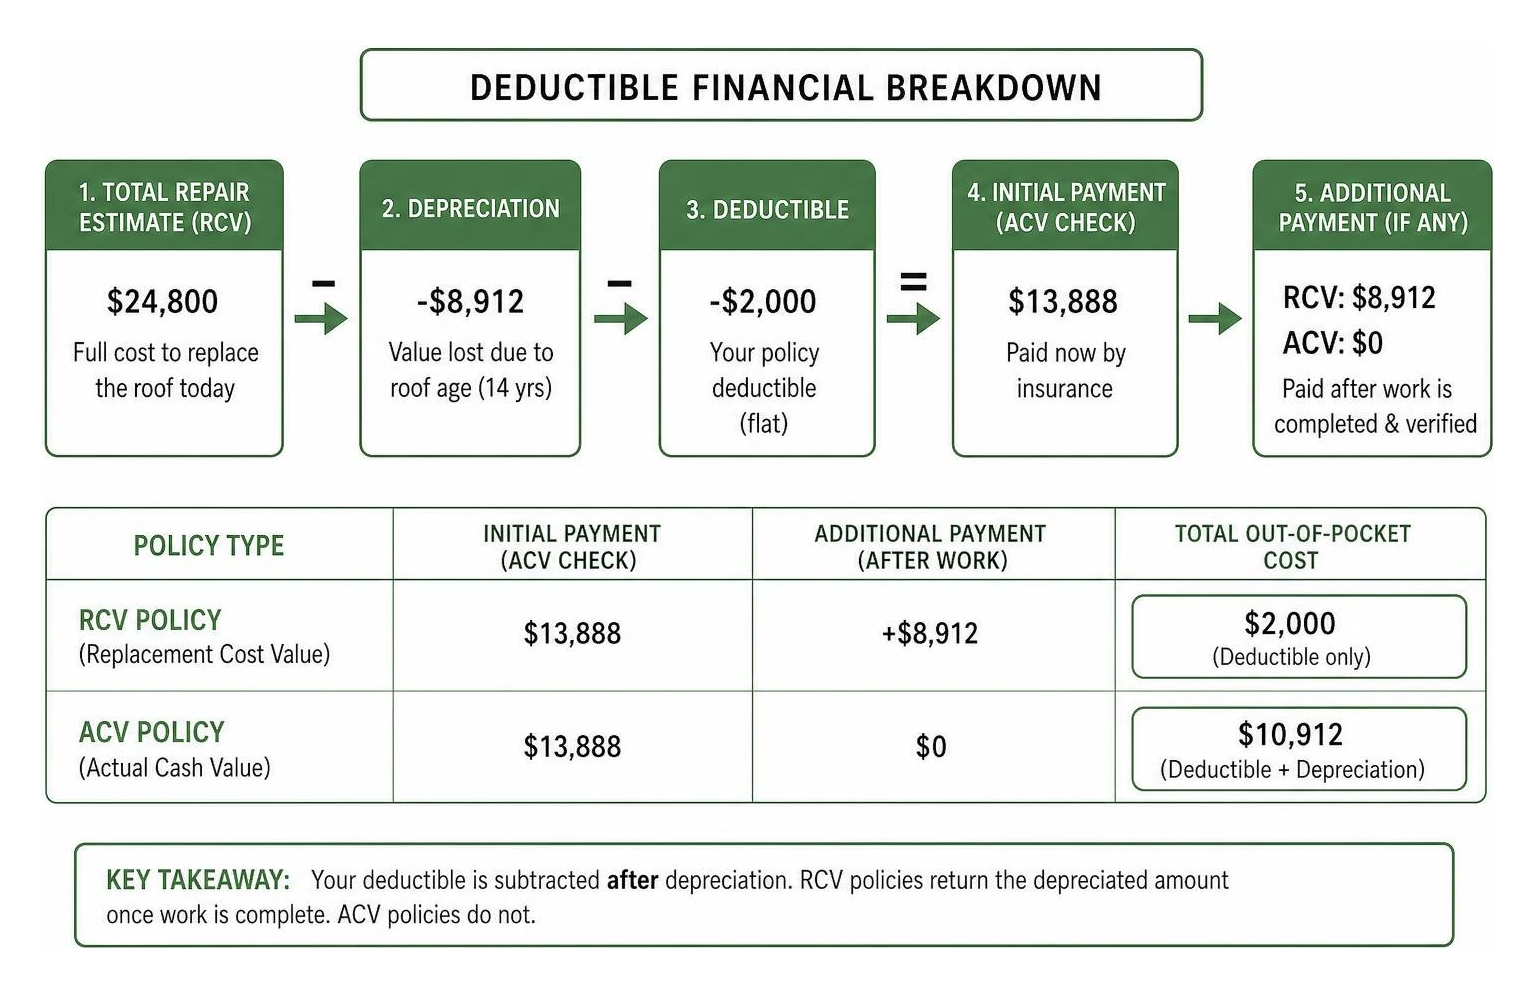
As shown in the table above, the math difference between an RCV policy and an ACV policy on a $24,800 replacement scope for a 14-year-old roof can mean an extra $8,912 to $13,888 coming directly out of your pocket.
Under an RCV policy, the carrier pays to replace your roof at current market rates. They release an initial ACV check (total scope minus depreciation and deductible). Once the roofing work is finished and verified, the carrier releases the withheld “recoverable depreciation.” Under an ACV policy, depreciation is non-recoverable, leaving you to cover the gap.
Managing Deductibles and Policy Limitations
Your deductible is your legal financial responsibility. If you have a flat $1,000 or $2,000 deductible, calculating your budget is straightforward. However, watch out for percentage-based deductibles:
A 2% named-storm deductible on a $400,000 home dwelling valuation equals an $8,000 out-of-pocket expense before your insurance policy pays a single dime.
Additionally, check your policy for Ordinance or Law coverage. If local building codes in Southeastern Wisconsin require ice and water shield upgrades, synthetic underlayment, or drip edge installation, policy code upgrade endorsements cover those required line items.
If you live in Walworth or Racine County, see our localized guide: Navigating Your Insurance Roof Claim in Burlington Like a Pro.
What Happens After the Inspection: Timelines, Denials, and Appeals
Once the adjuster completes their walk, the field inspection transitions to paperwork processing.

Post-Inspection Timeline and Recoverable Depreciation
Here is what the standard post-inspection timeline looks like:
- Written Scope Delivery (5 to 14 Days): You receive the adjuster’s summary estimate detailing approved line items, square footage counts, and pricing calculations.
- First Check Release (14 to 30 Days): The carrier issues the initial ACV check payable to you (and usually your mortgage lender).
- Roof Installation & Invoicing: Your chosen roofing contractor completes the replacement according to local codes and submits a final invoice along with certificate of completion photos.
- Recoverable Depreciation Released (7 to 14 Days Post-Completion): The carrier releases the remaining withheld depreciation funds to close out the claim.
To see how to manage contractor scheduling during this period, check out The Shingle Life: A Guide to Getting Your Roof Replaced by Insurance.
How to Dispute Denials or Underpaid Scope
If the adjuster denies your claim or underpays the scope of work, don’t panic. You have formal dispute options:
- Request a Formal Written Denial: Obtain an official denial letter specifying the exact policy exclusions or reasons cited.
- Submit a Supplemental Claim: If your contractor finds hidden decking rot or missing line items (like code upgrades or ridge cap quantities), they can submit date-stamped photo evidence and an Xactimate supplement directly to the desk adjuster.
- Request a Re-Inspection: Ask for a second inspection with a senior or independent adjuster, ensuring your roofing contractor attends.
- Invoke the Policy Appraisal Clause: If you and the insurer disagree on the financial amount of loss, invoking your policy’s formal appraisal provision brings in independent appraisers to establish the loss value.
For professional support navigating carrier disputes, read Public Adjusters and Roof Claims: What Your Insurance Company Won’t Tell You or consult qualified industry professionals like field inspector Donald Rice.
Frequently Asked Questions About Roof Insurance Inspections
How long does an insurance adjuster roof inspection take?
Most residential adjuster inspections take 30 to 60 minutes. Factors like steep pitch, complex hip-and-valley designs, multi-story heights, or extensive storm damage across siding and gutters can extend the inspection to 90 minutes.
What if the adjuster’s scope is lower than my contractor’s estimate?
This is extremely common. Adjusters frequently miss specific line items like drip edges, starter shingle courses, code-mandated ice and water shields, or waste percentages. Your roofing contractor can submit a line-by-line itemized supplement with matching photo evidence to bridge the gap before work starts.
Can I be penalised or have my rates raised for filing a roof claim?
In most states, insurance companies cannot legally single you out for a rate increase due to a weather-related “Act of God” claim. However, carriers can adjust base premiums regionally across an entire zip code or county following severe catastrophe events.
Protect Your Home with Local Expertise
Navigating an insurance adjuster roof inspection doesn’t have to be overwhelming. When you have an experienced, local advocate by your side who knows Wisconsin weather, local building codes, and insurance scope line items, you can approach inspection day with confidence.
At Smith Roofing & Exteriors, our team provides Fort Atkinson and Southeastern Wisconsin homeowners with honest, transparent advice, detailed photo documentation, and professional representation during adjuster meetings.
If you suspect recent wind or hail damage on your home, don’t wait for a ceiling leak to reveal the problem. Contact us today to schedule your pre-claim inspection or learn more about our Fort Atkinson Storm Damage Restoration Services.